Regular tags work directly from the user’s browser, which creates several problems: ad blockers block requests, data gets lost.
Server Side GTM solves these problems: events are sent through your own server, bypassing ad blockers, improving data accuracy and GDPR compliance.
I decided it’s time to join the Server Side of the force.
Setting Up Server Side GTM
Google Analytics
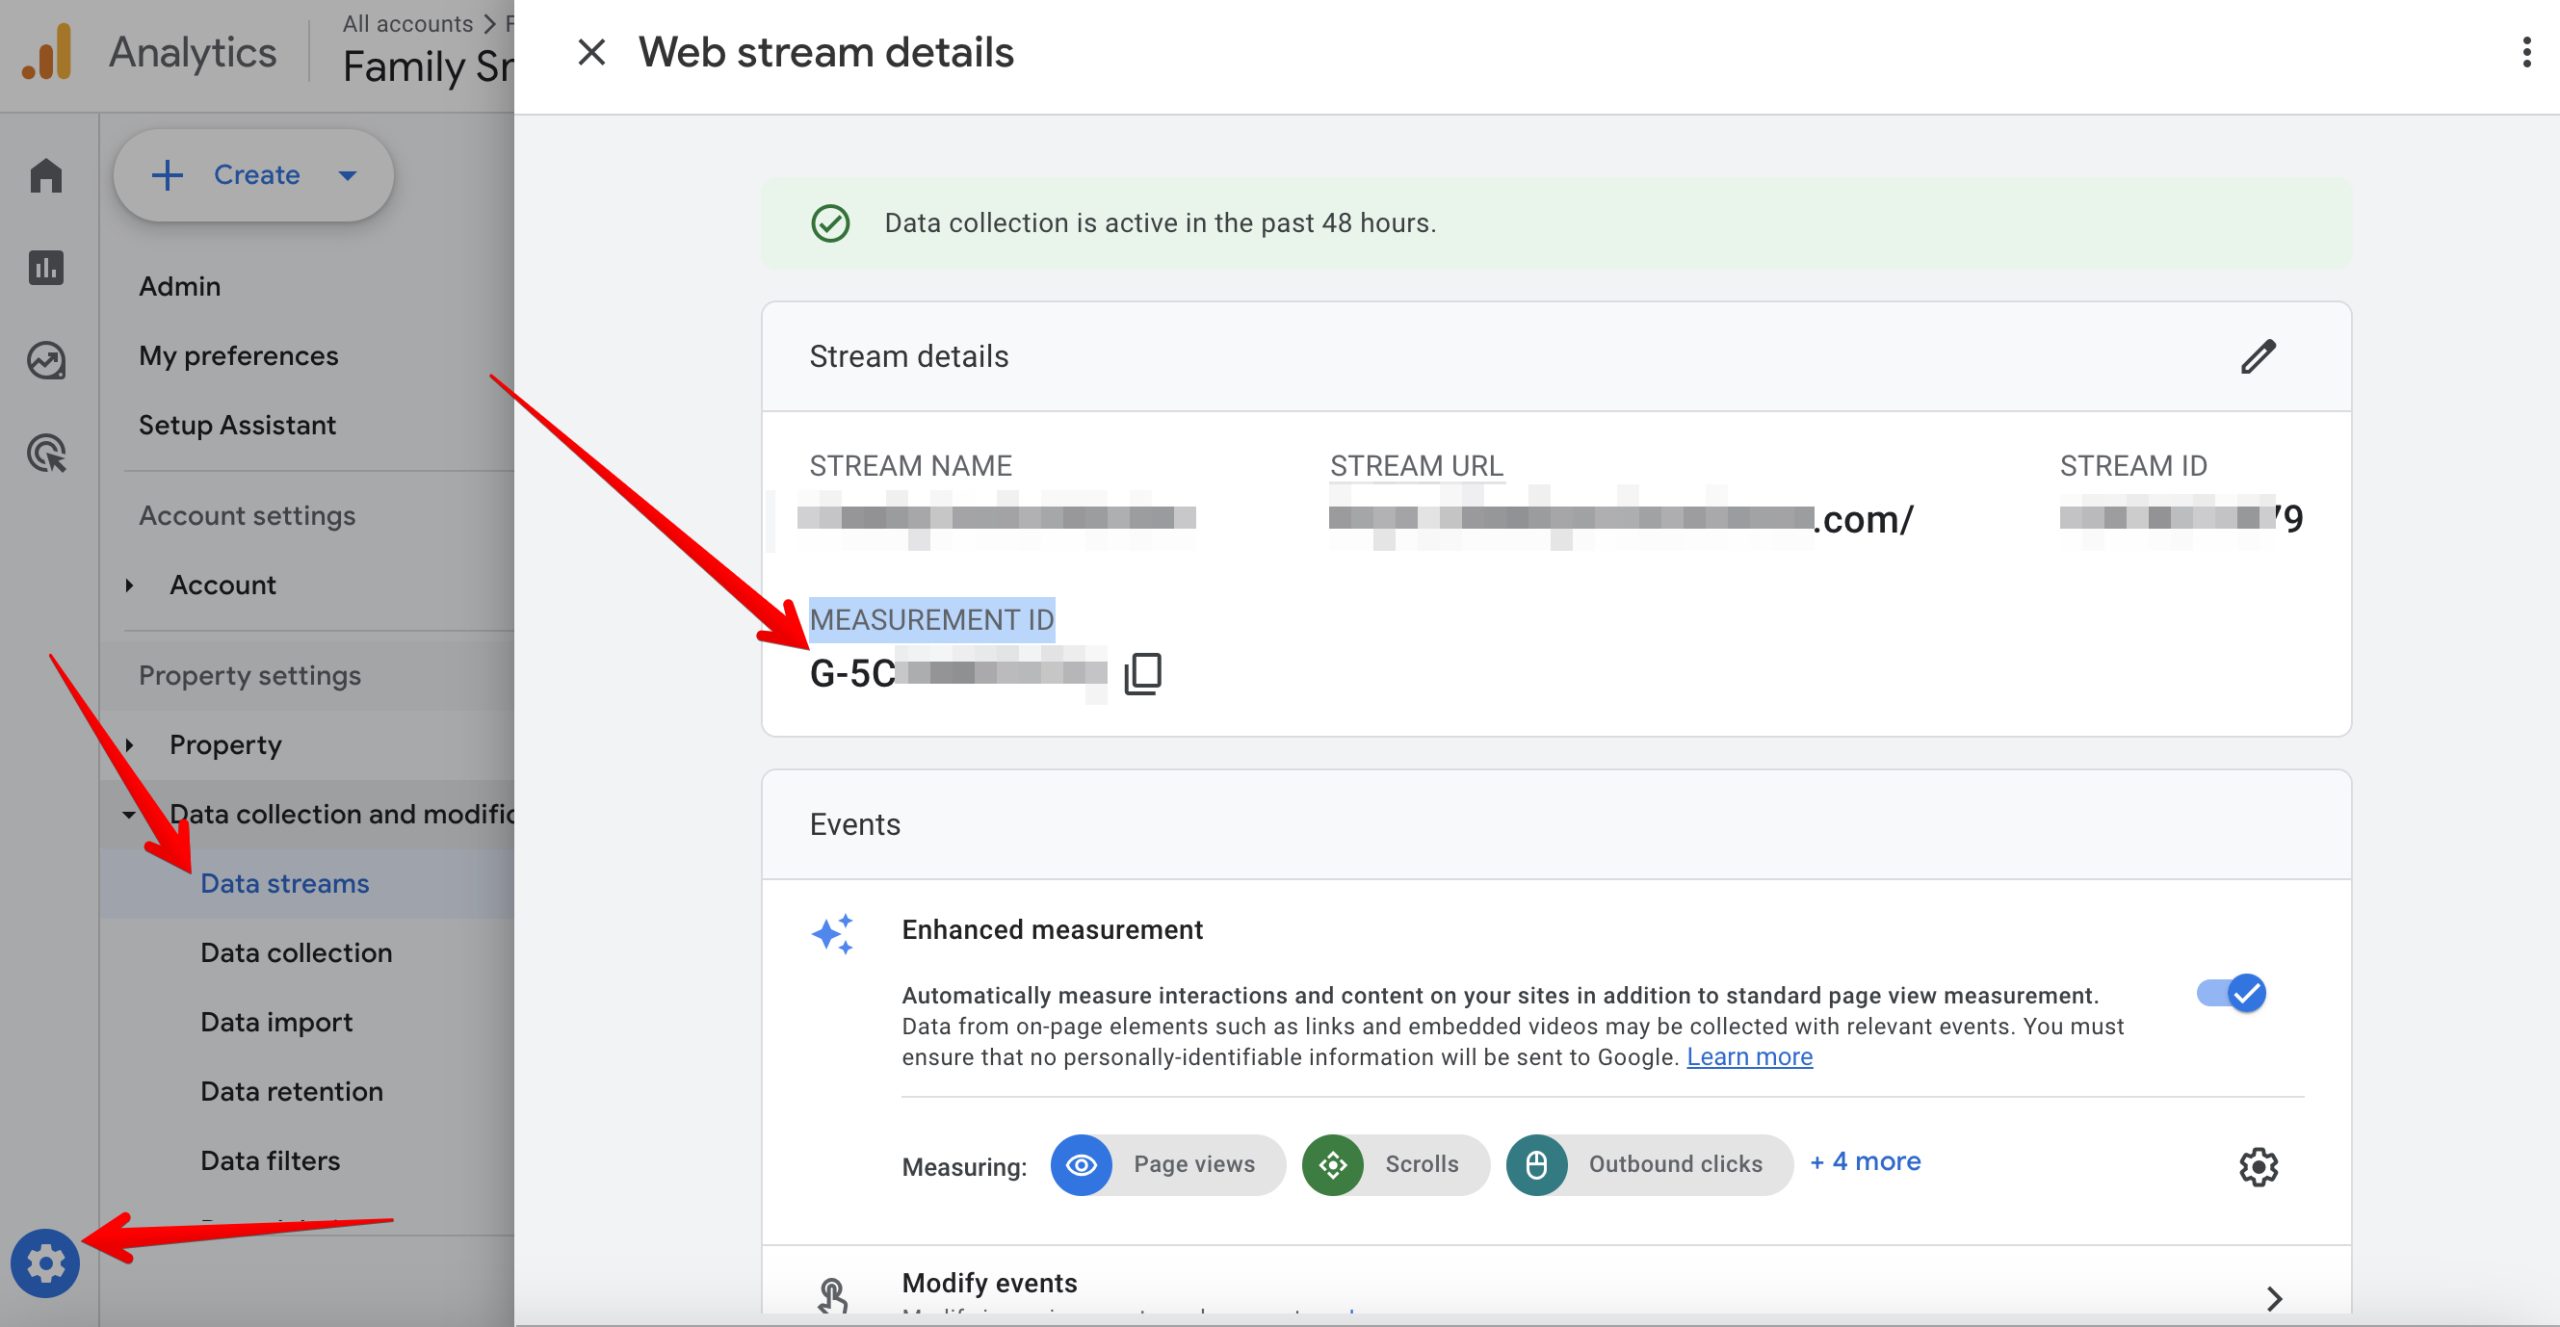
Create Google Analytics for your site. Separate properties, web. As usual. Then go to Admin → Data Streams. Open site settings and copy the Measurement Id (like G-5CAAAANNNN). Save it, we’ll need it later.
Server Container
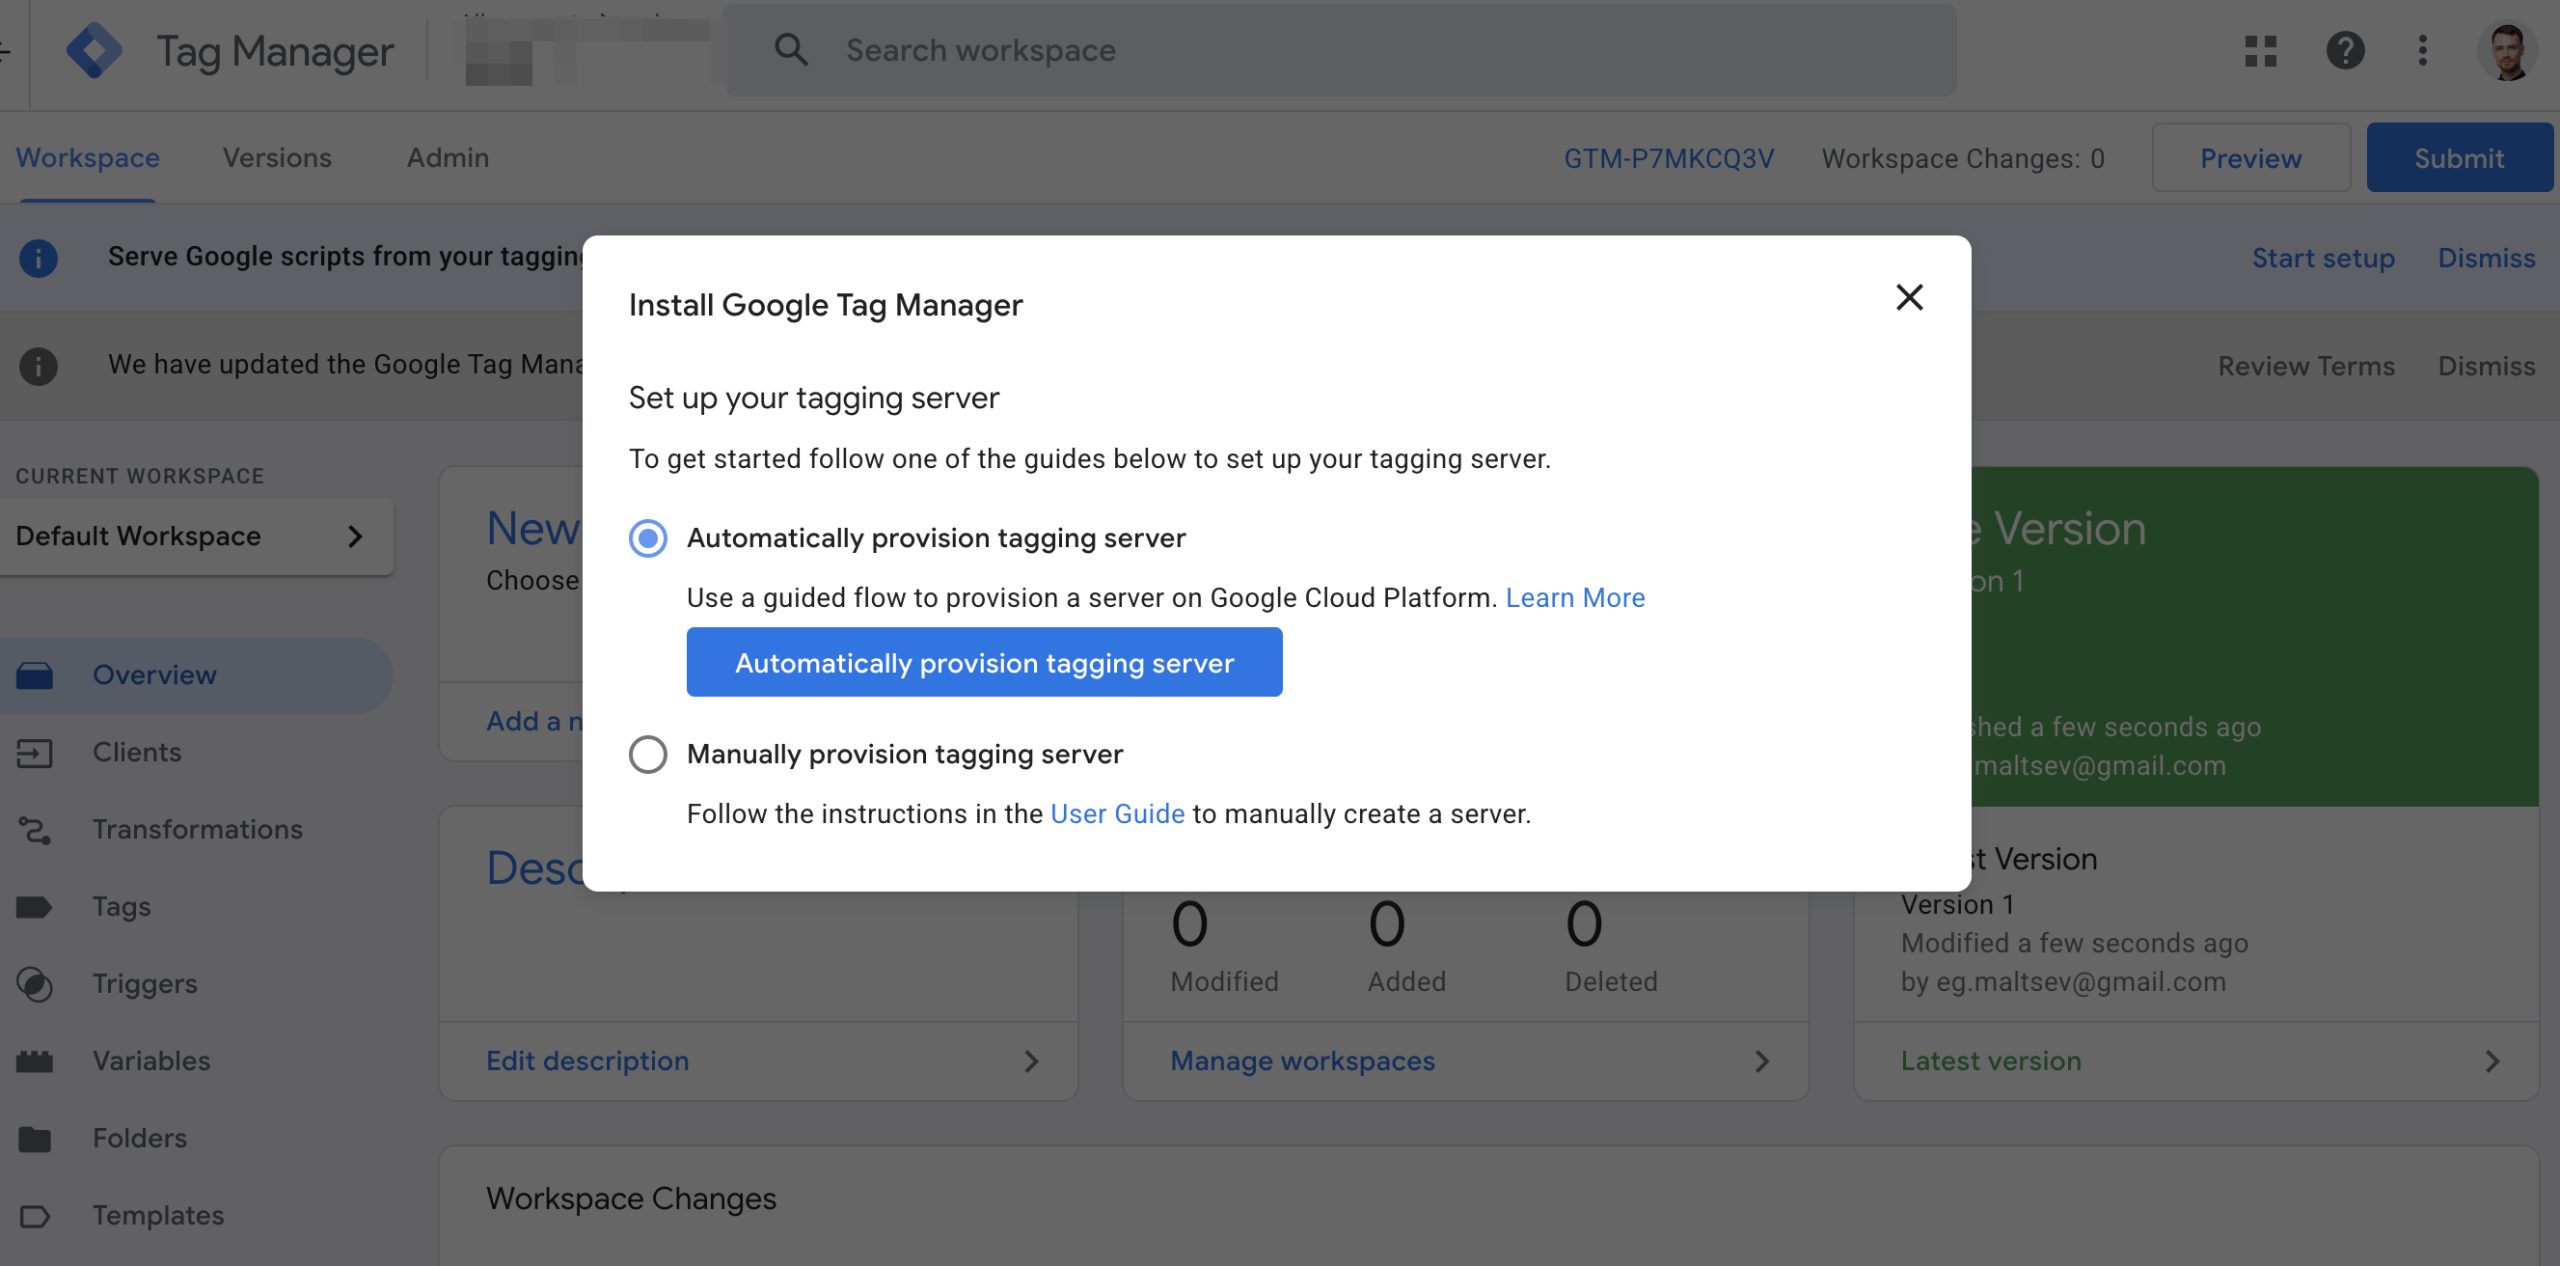
Go to Google Tag Manager. Create a server container. During creation, you’ll be offered Automatically provision tagging server — select this option. A server will be created in Google Cloud Run. Free up to 2 million events per month. All events will pass through this server.
Domain Mapping
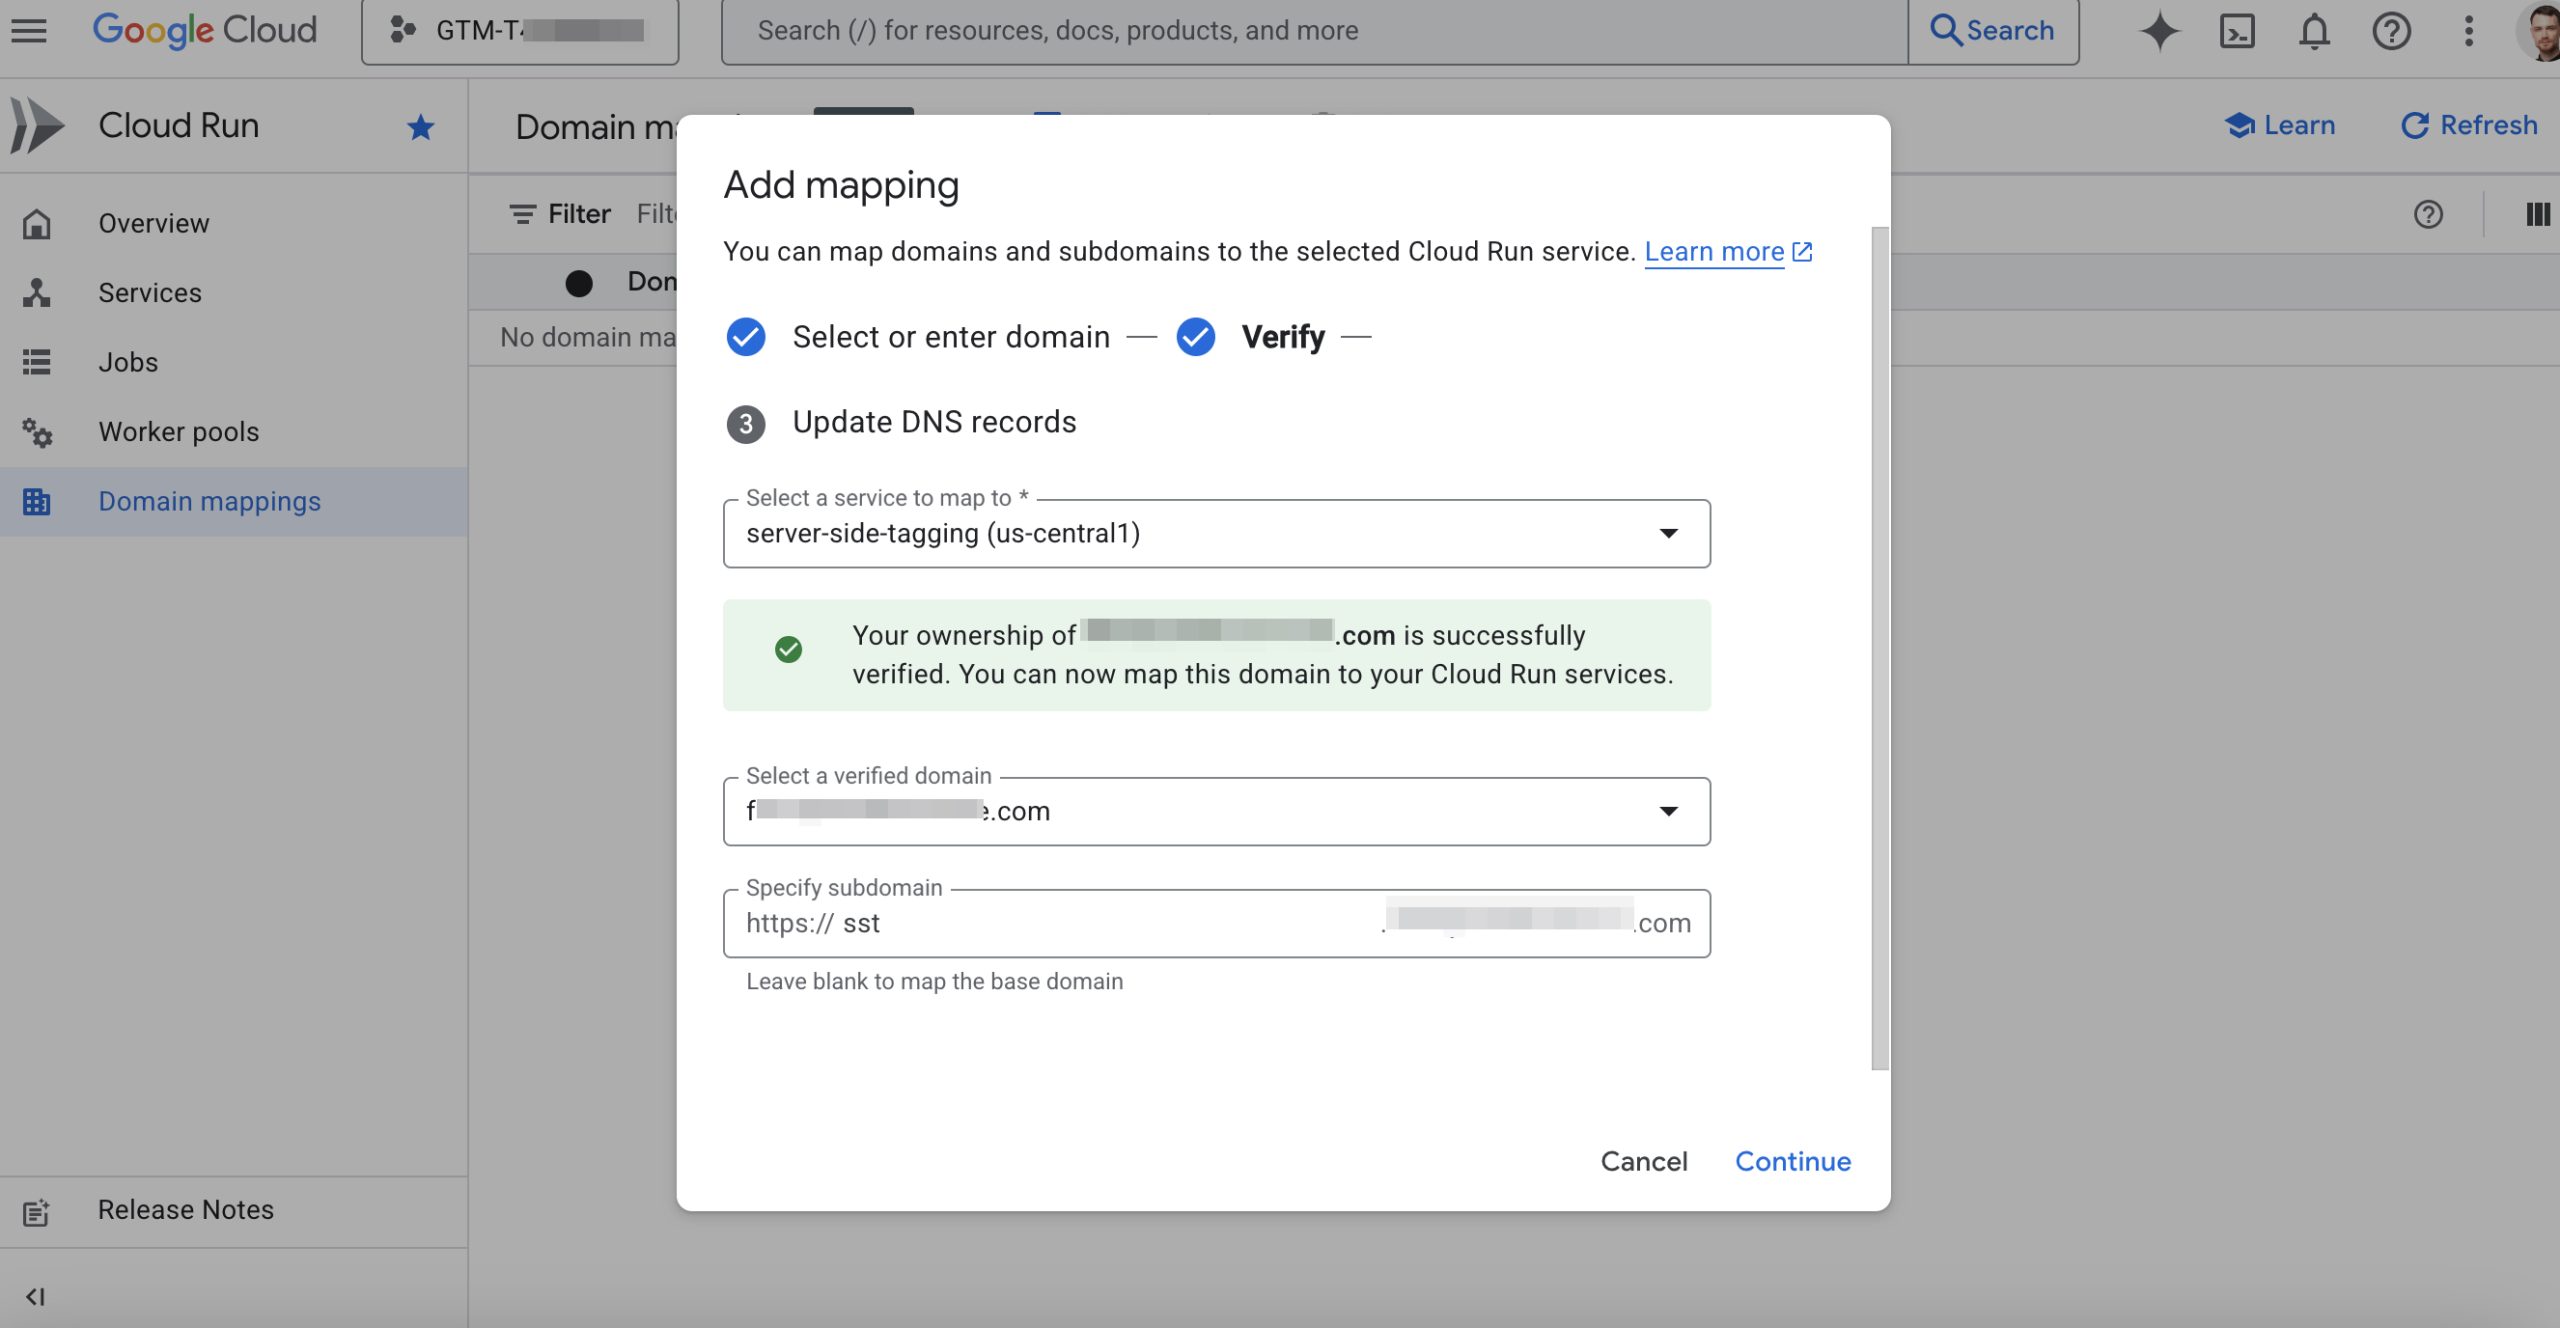
If needed, bind your own domain to Cloud Run: Domain mappings → Add mapping → in Base domain specify the main domain (not subdomain), verify through Google Search Console. Then add a CNAME record pointing to ghs.googlehosted.com in your DNS editor.
GA4 Tag on Server
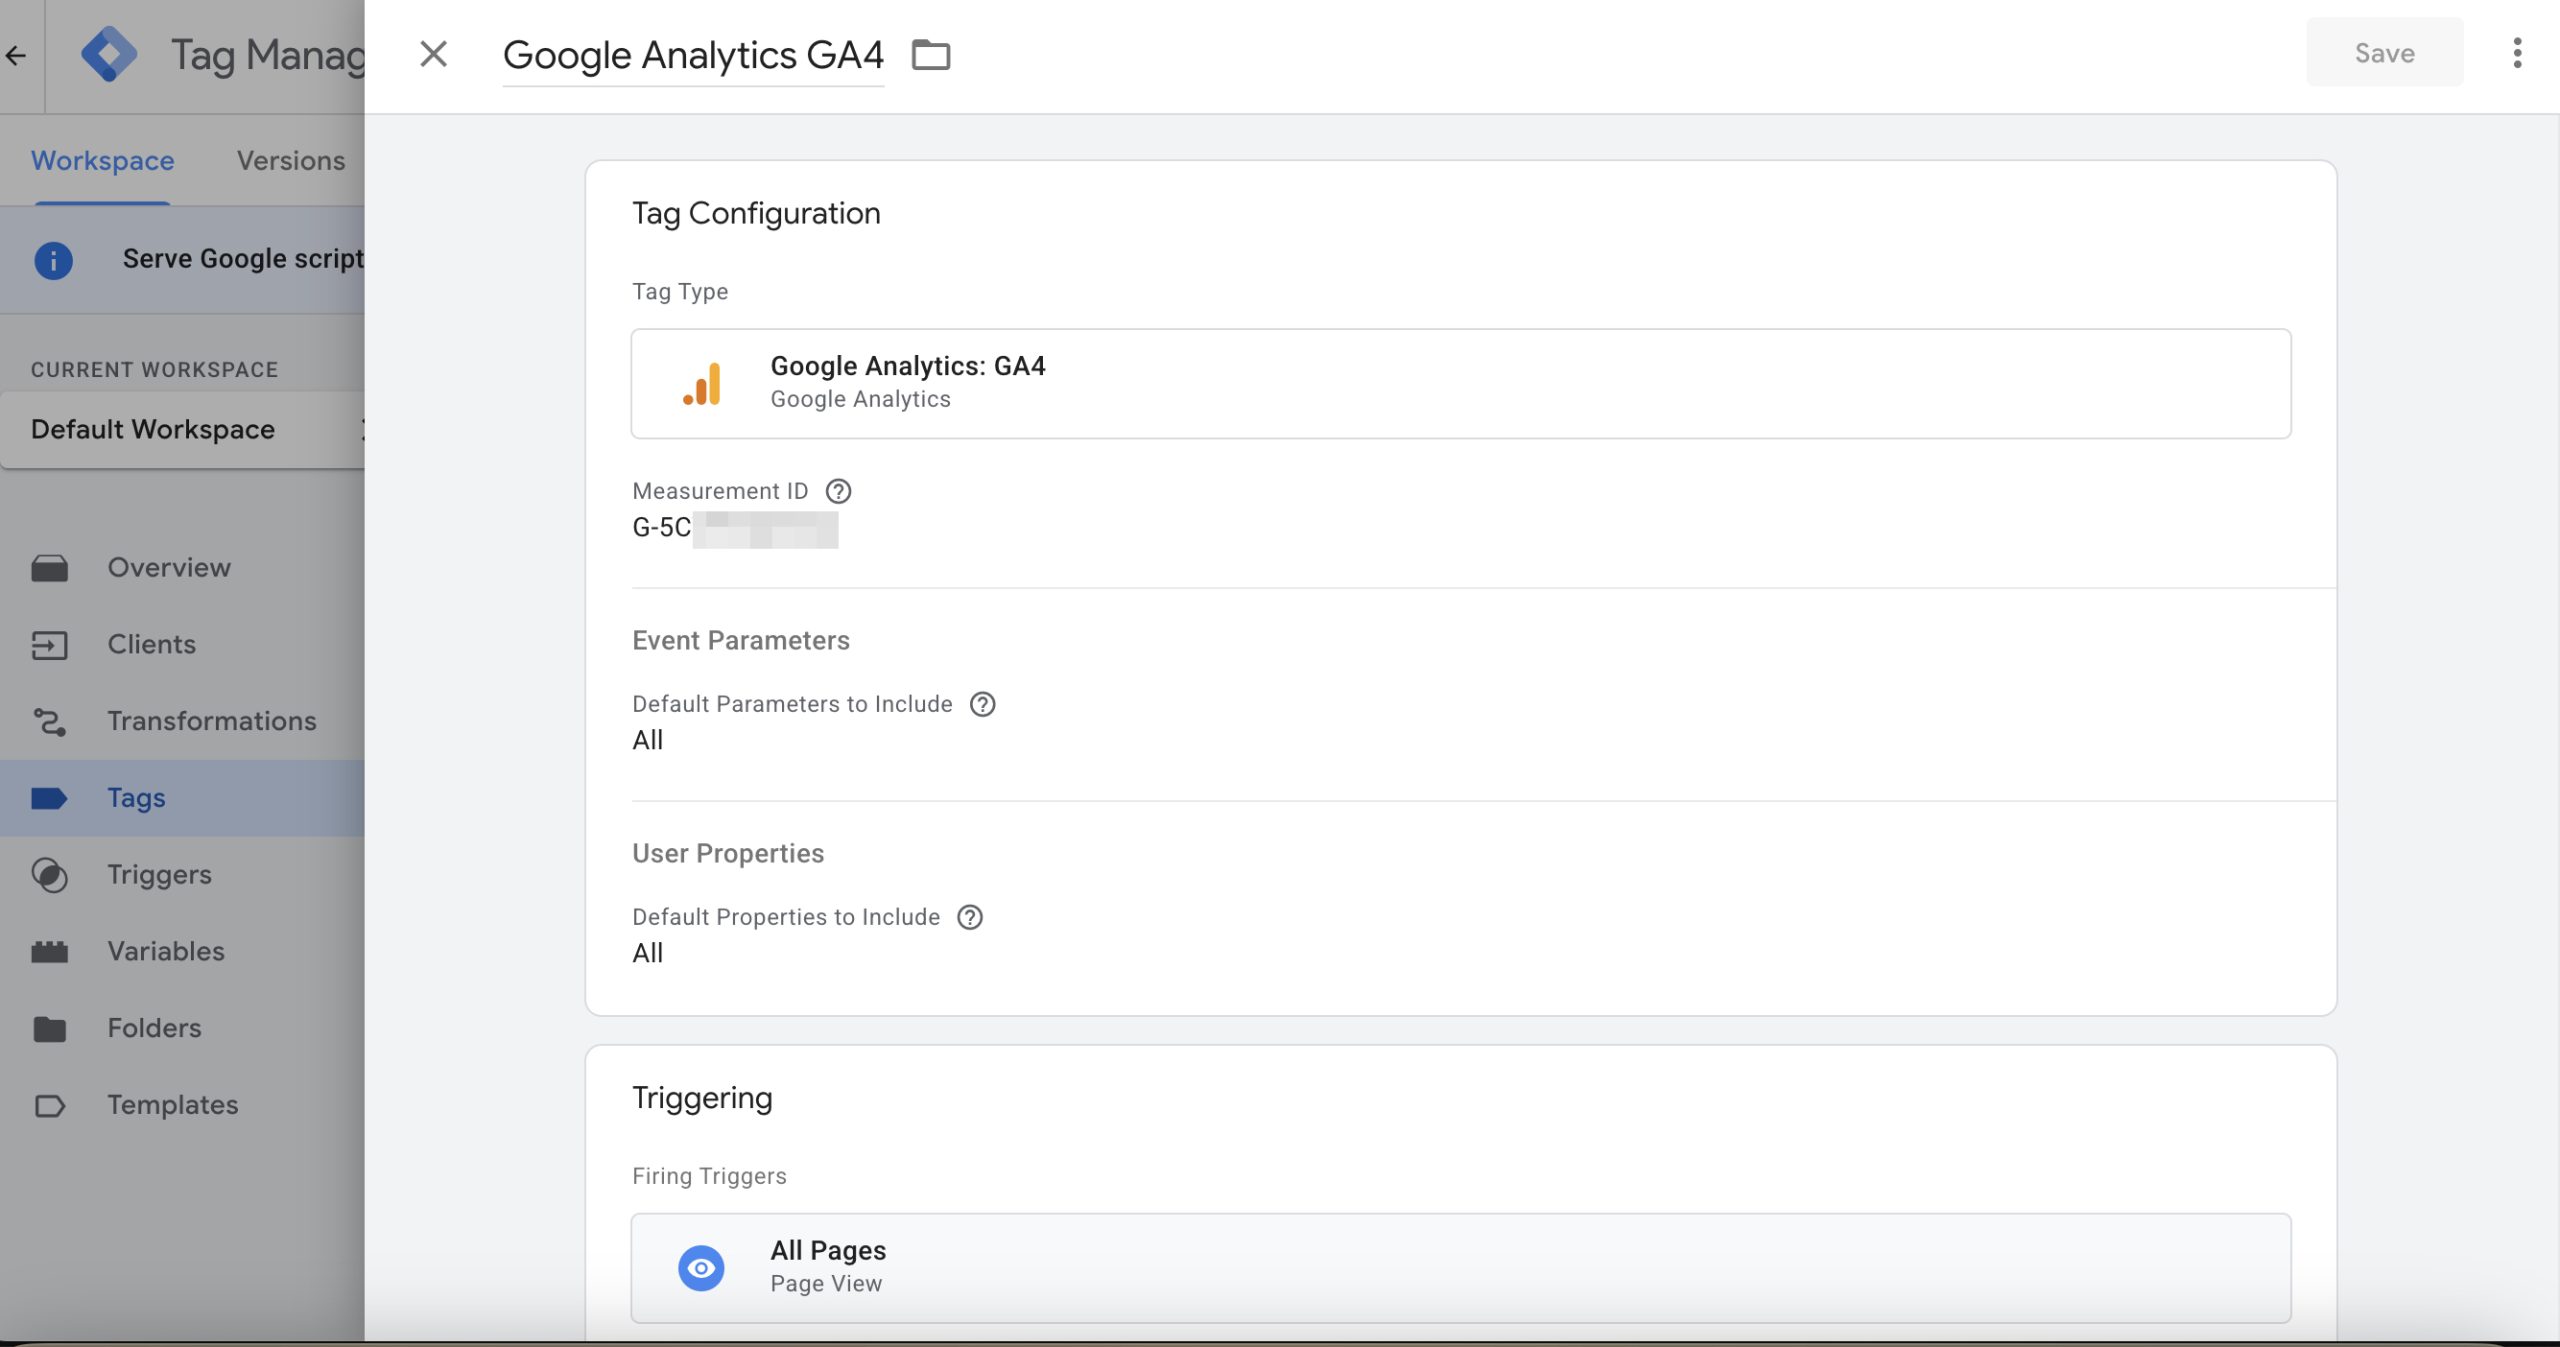
In the server container there’s a Client — it’s created by default. You also need to create a Google Analytics: GA4 tag and enter the Measurement ID we saved from Google Analytics. By default, this tag fires on the All Pages event and sends data to Google Analytics. We’ll add more events later.
Web Container
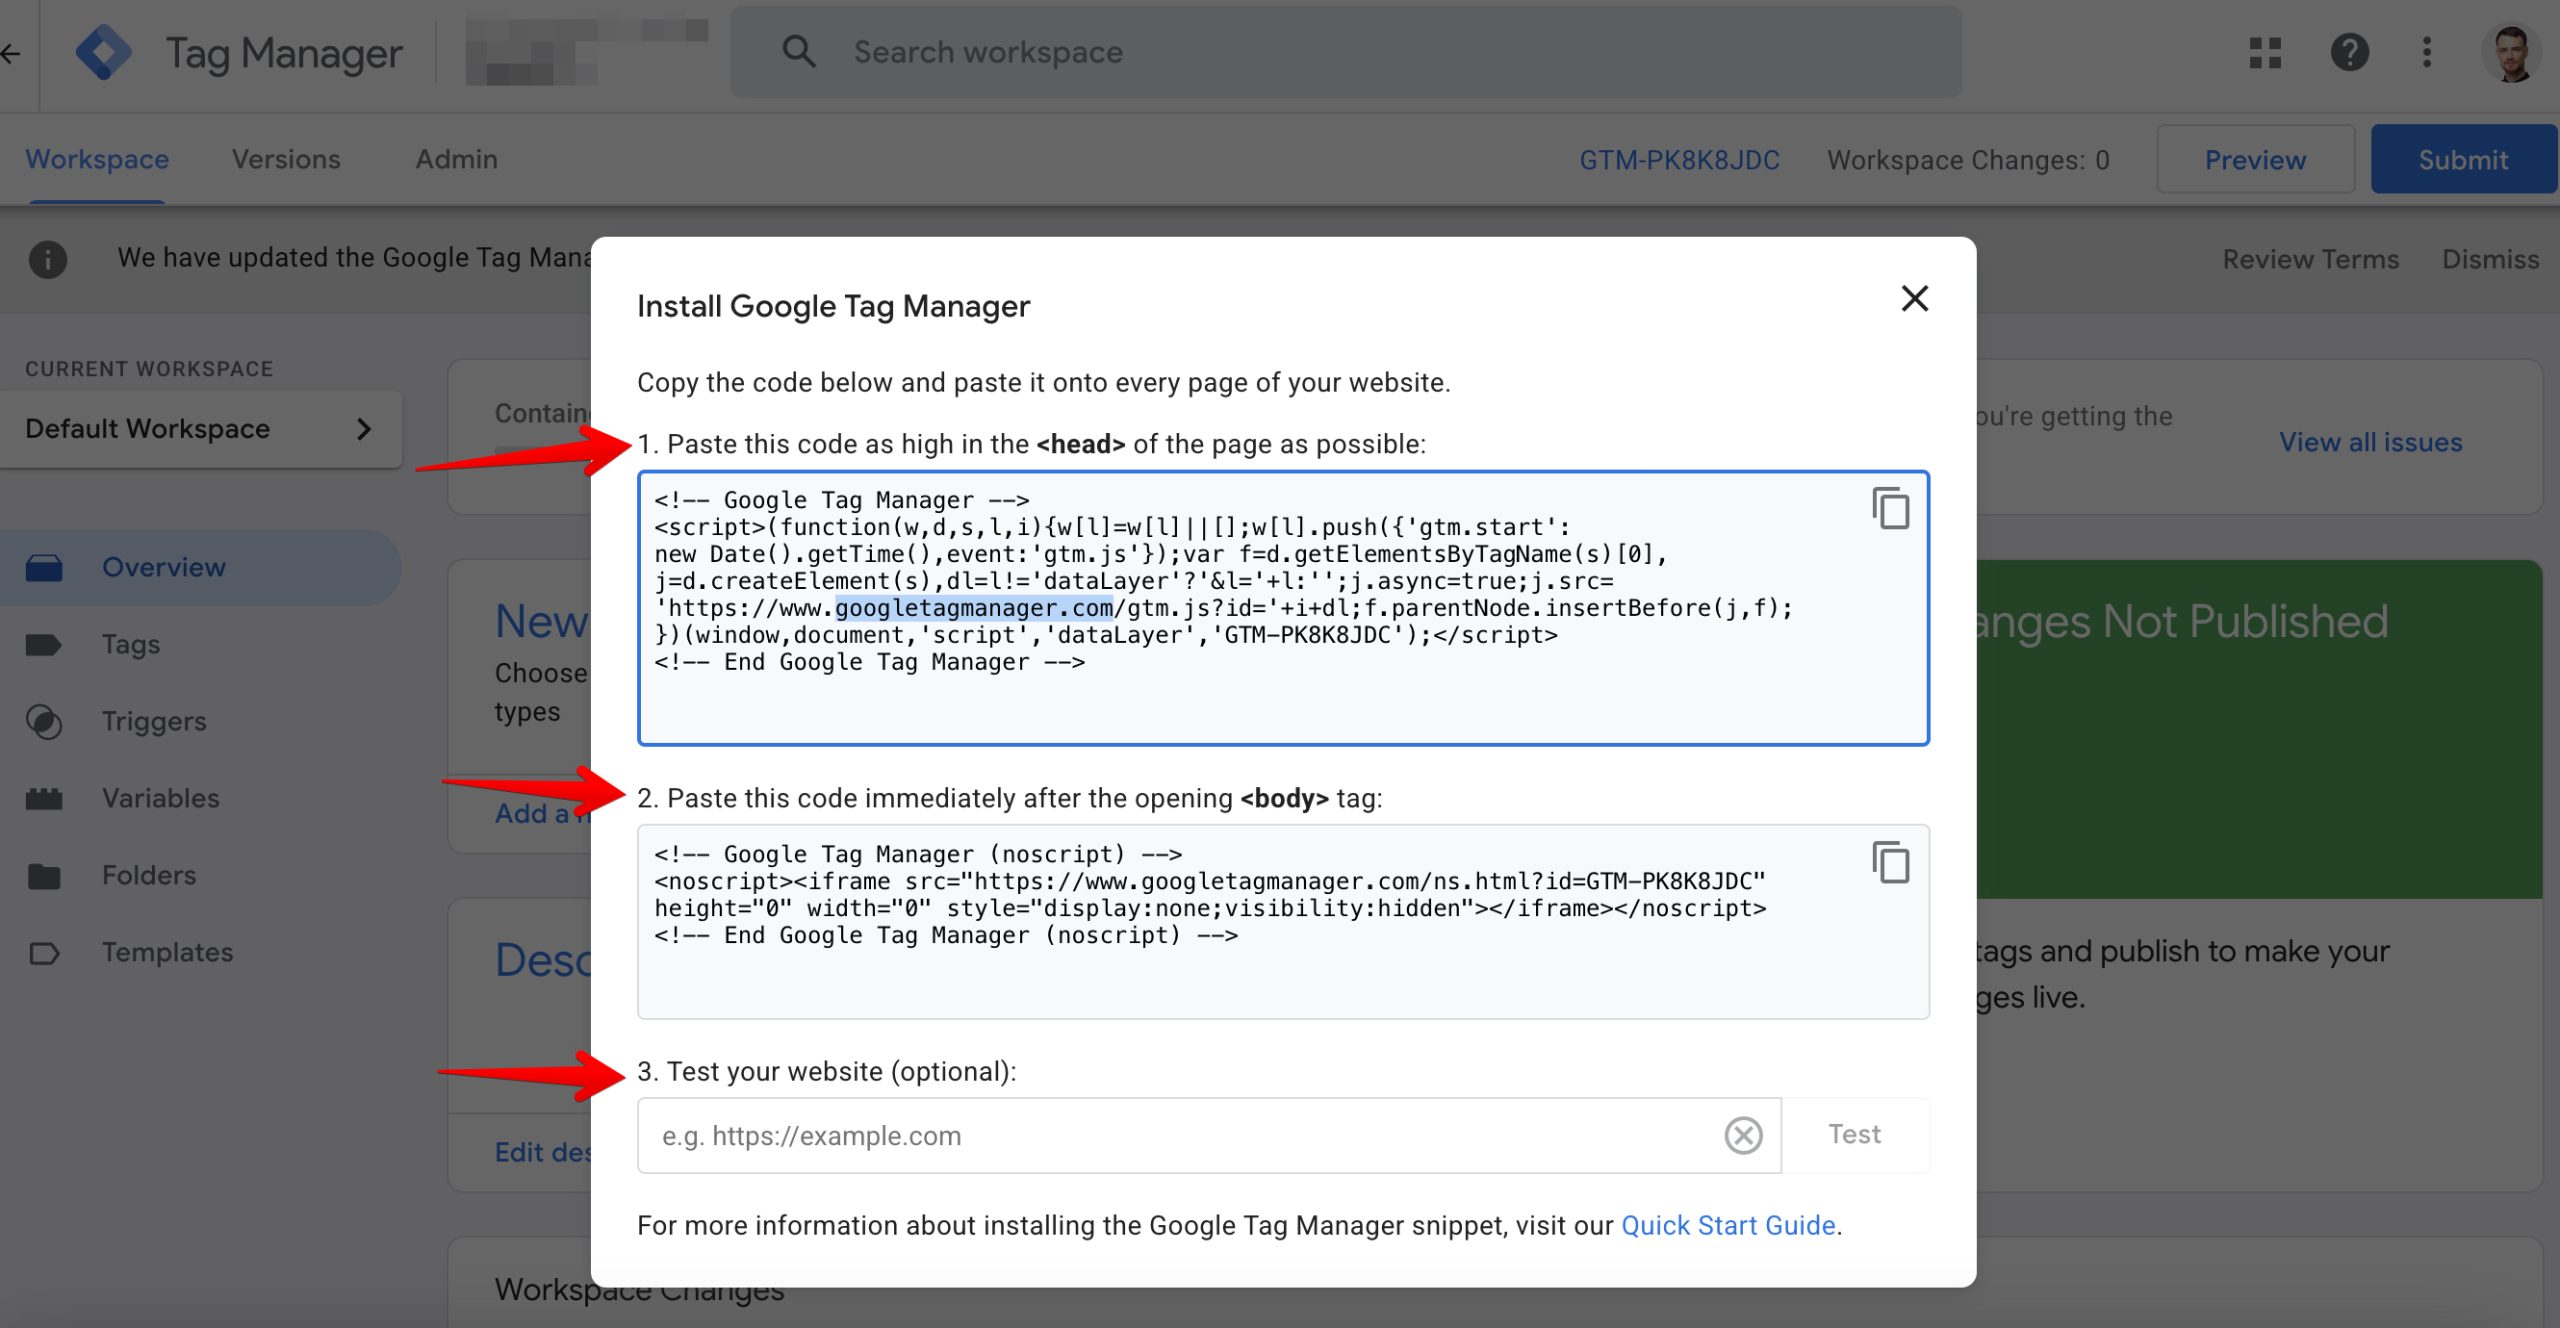
Next, create a web container. Copy and paste the tracking code to your site following the instructions. Verify everything works.
Server URL Variable
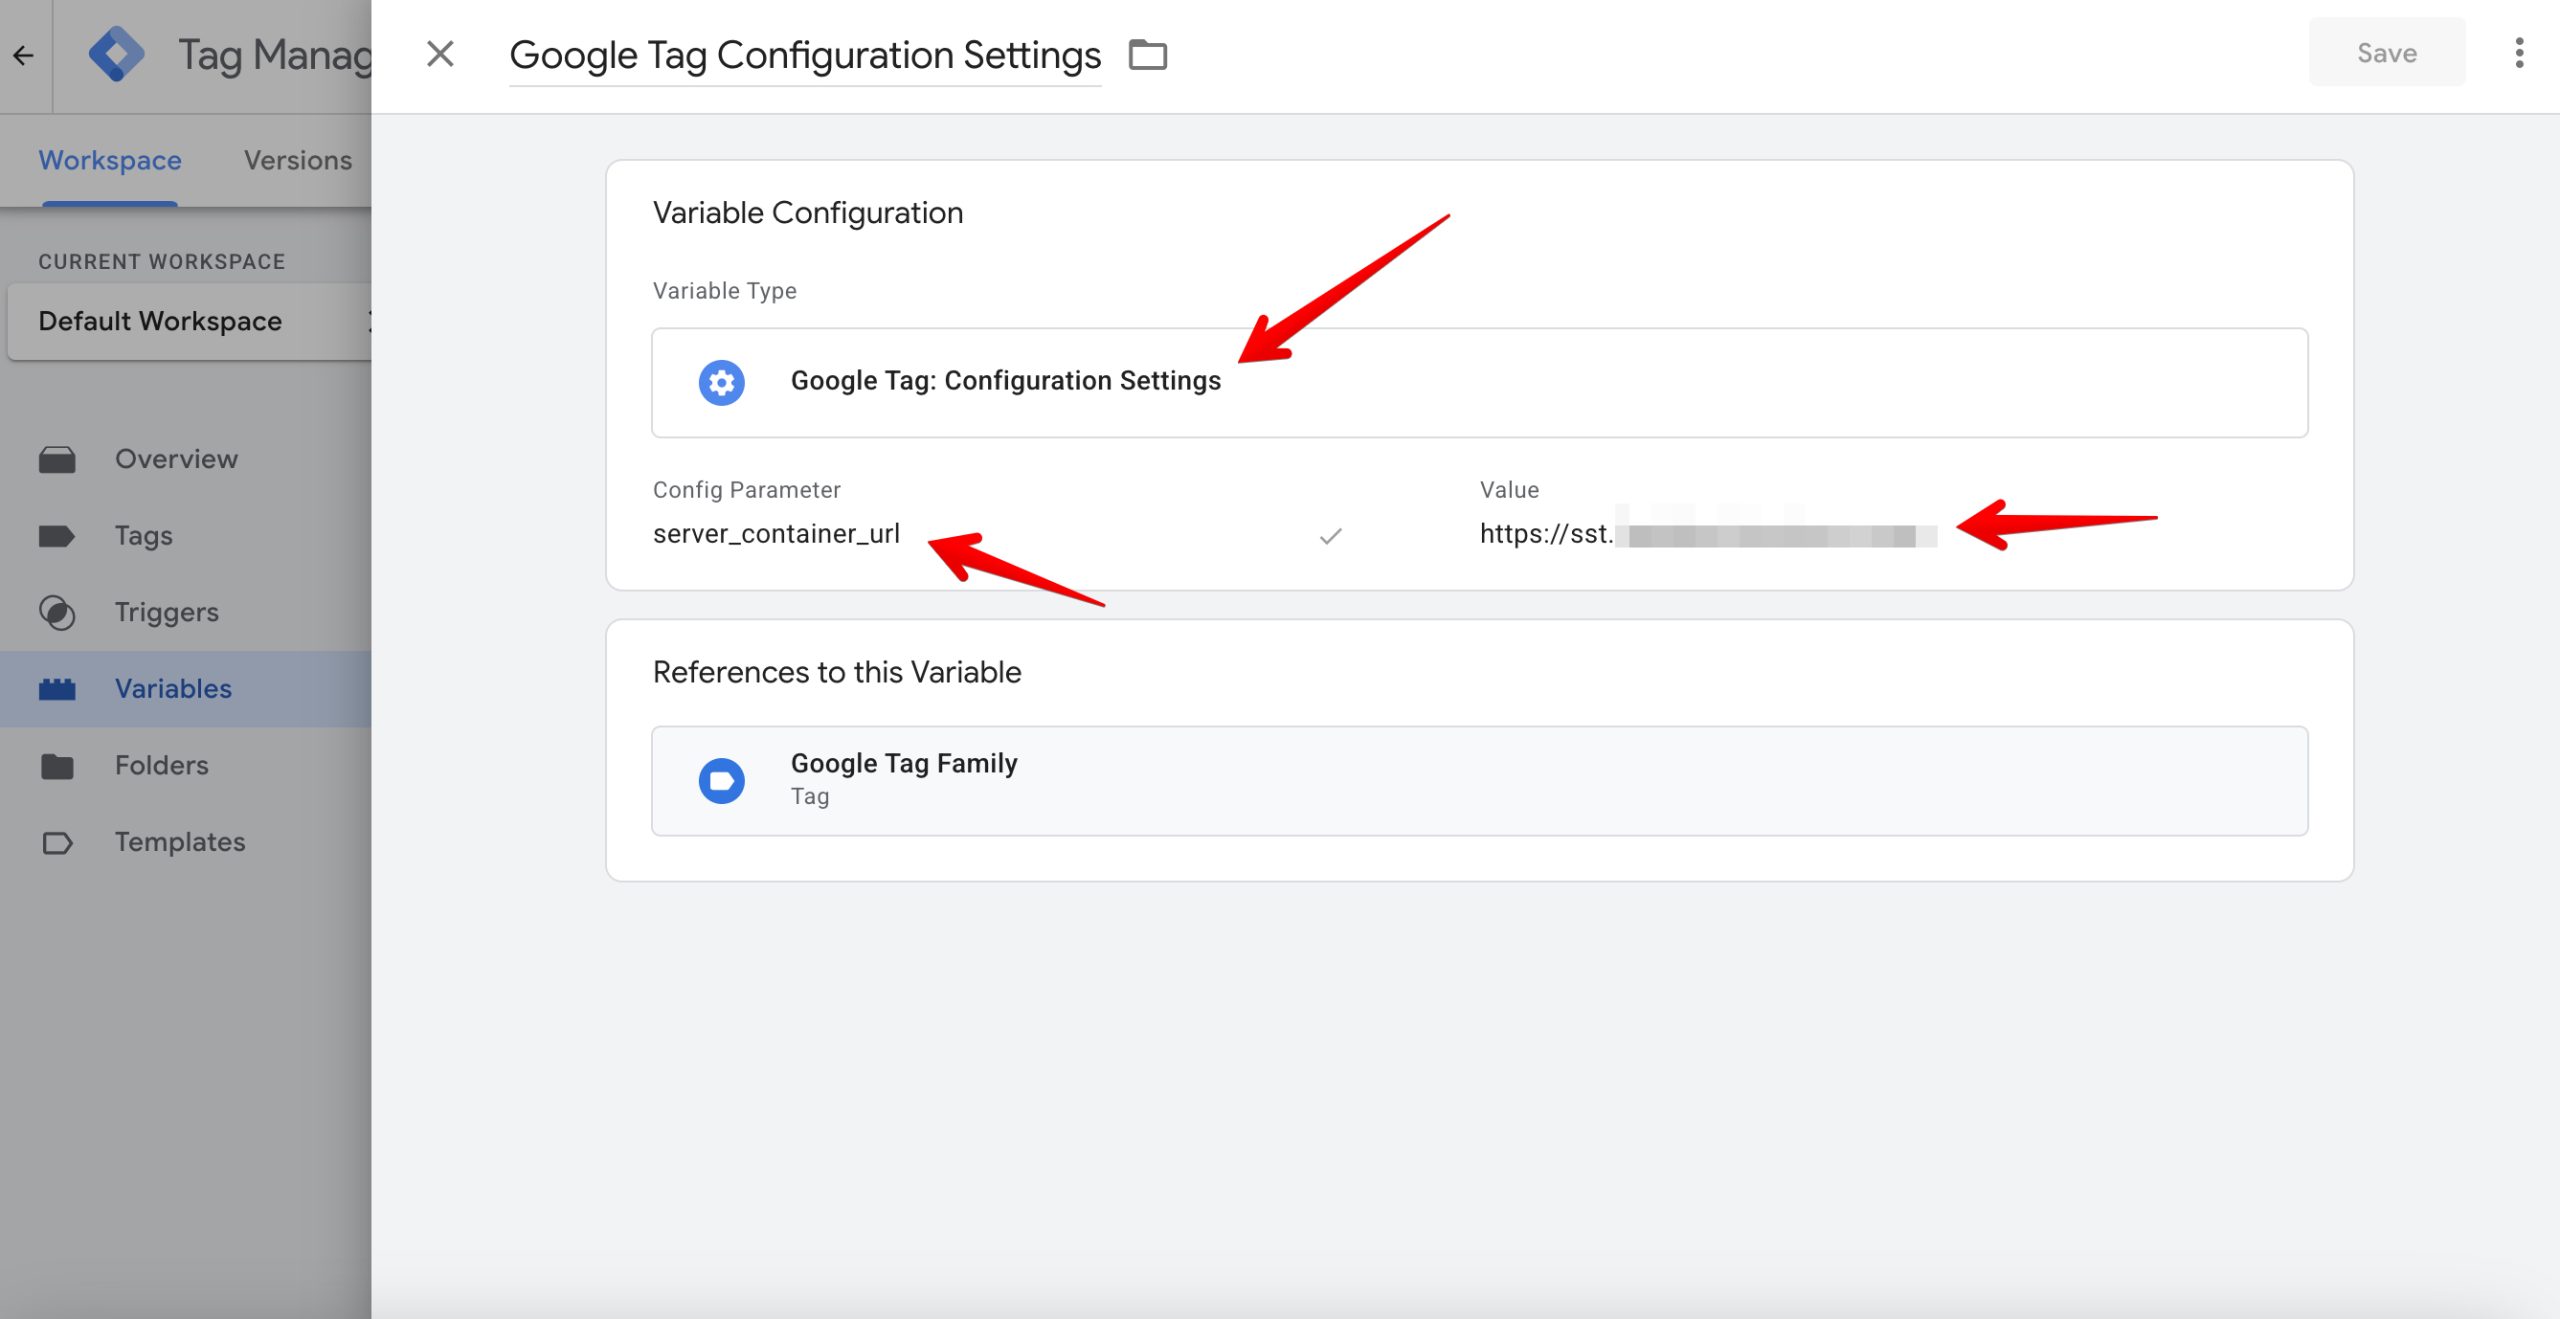
In the web container, we’ll create a setting to connect to our server. Go to Variables and create User-Defined Variables. Type Google Tag: Configuration Settings, parameter: server_container_url, value: https://sst.site.com (your server URL).
Google Tag
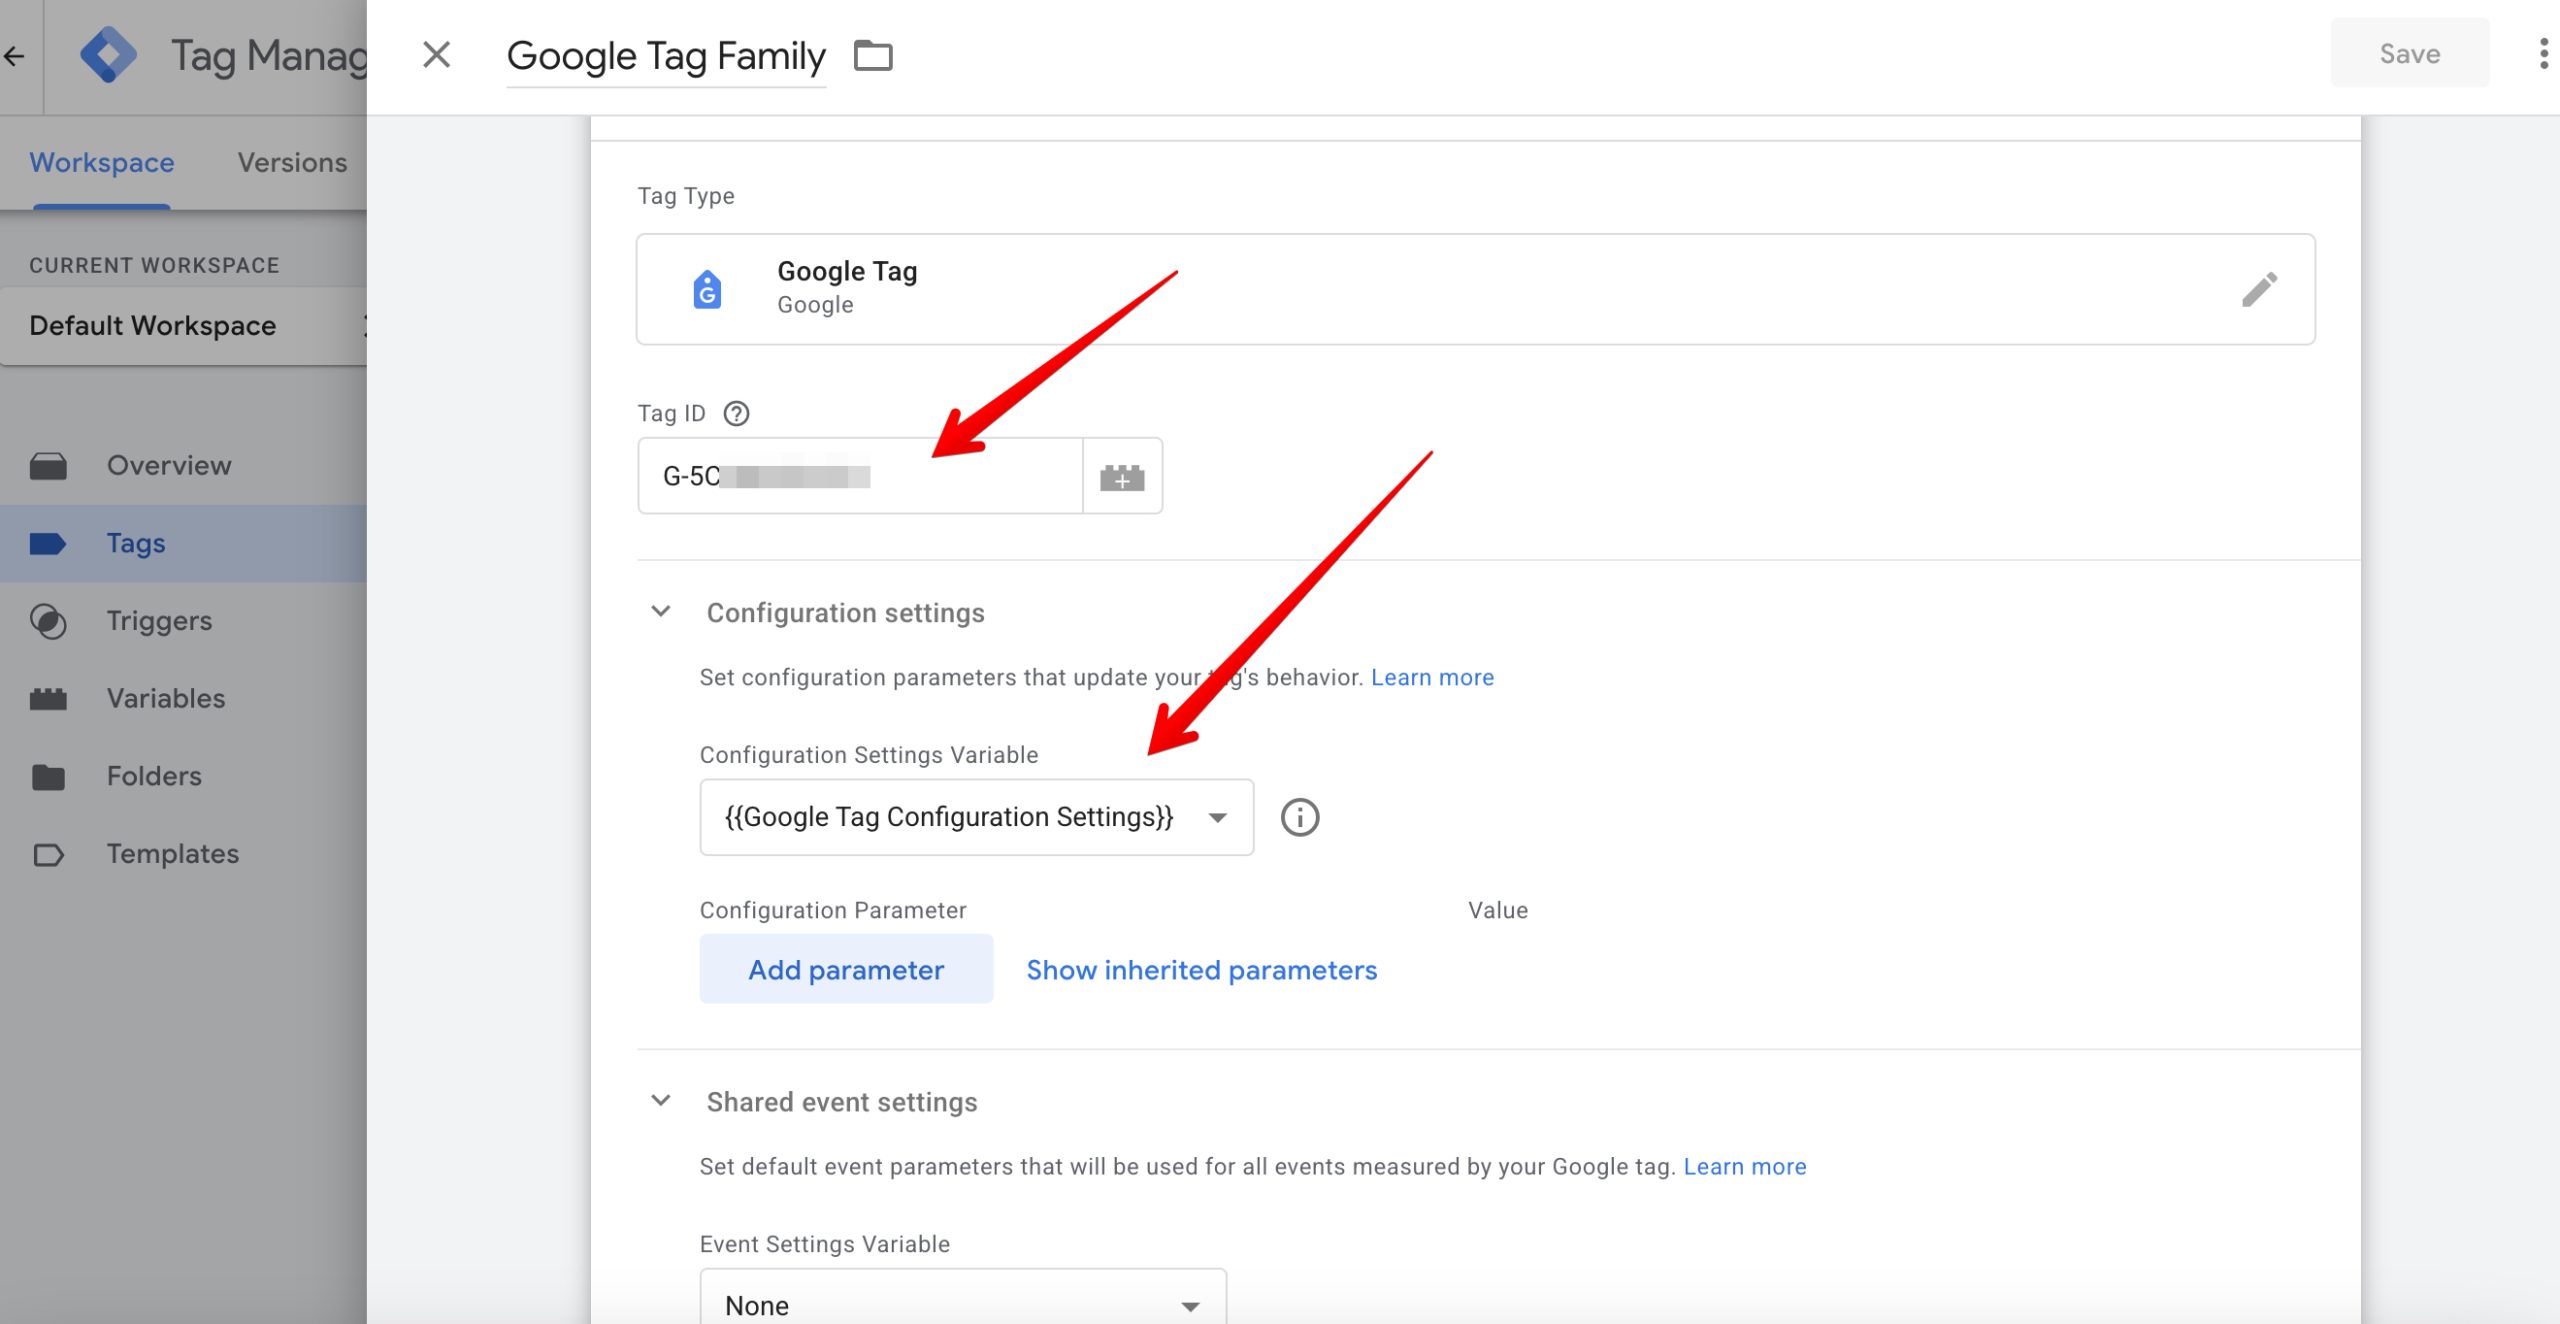
Then in the web container create a Google Tag. It will connect the site to the server. In Tag ID enter the Measurement Id from Google Analytics. In Configuration settings select {{Google Tag Configuration Settings}} — the variable containing our server URL. Add all events the tag should trigger on.
Extension for Frontend Testing
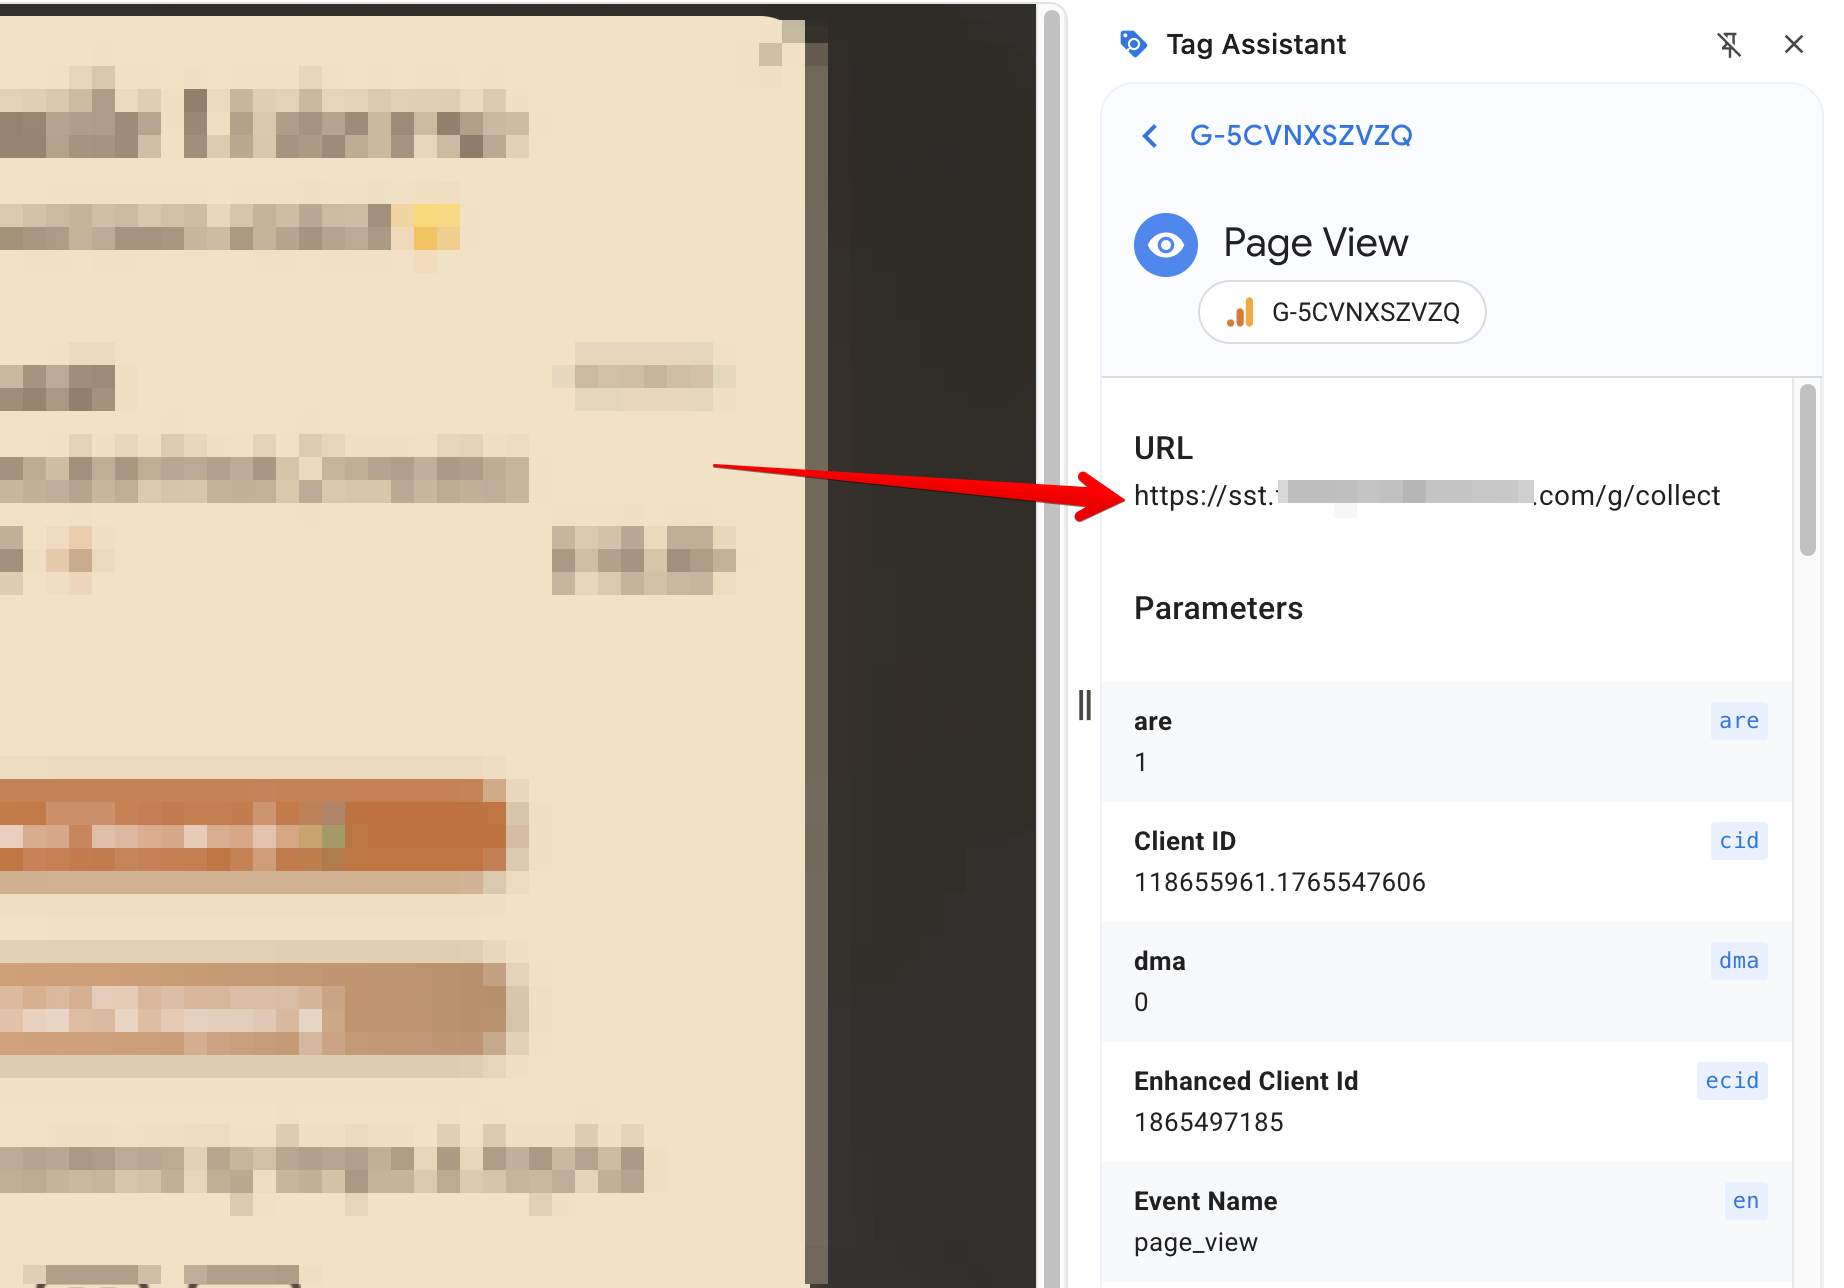
The base is ready. To verify the tag works, install the official Tag Assistant extension from Google Chrome. Go to your site and open it. If everything is set up correctly, requests will go to your server instead of the standard URL. This is important!
Server Preview
You also need to verify the server works. Go to the server container and click preview. Then trigger any event on your site. In preview you should see that it receives requests from the site.
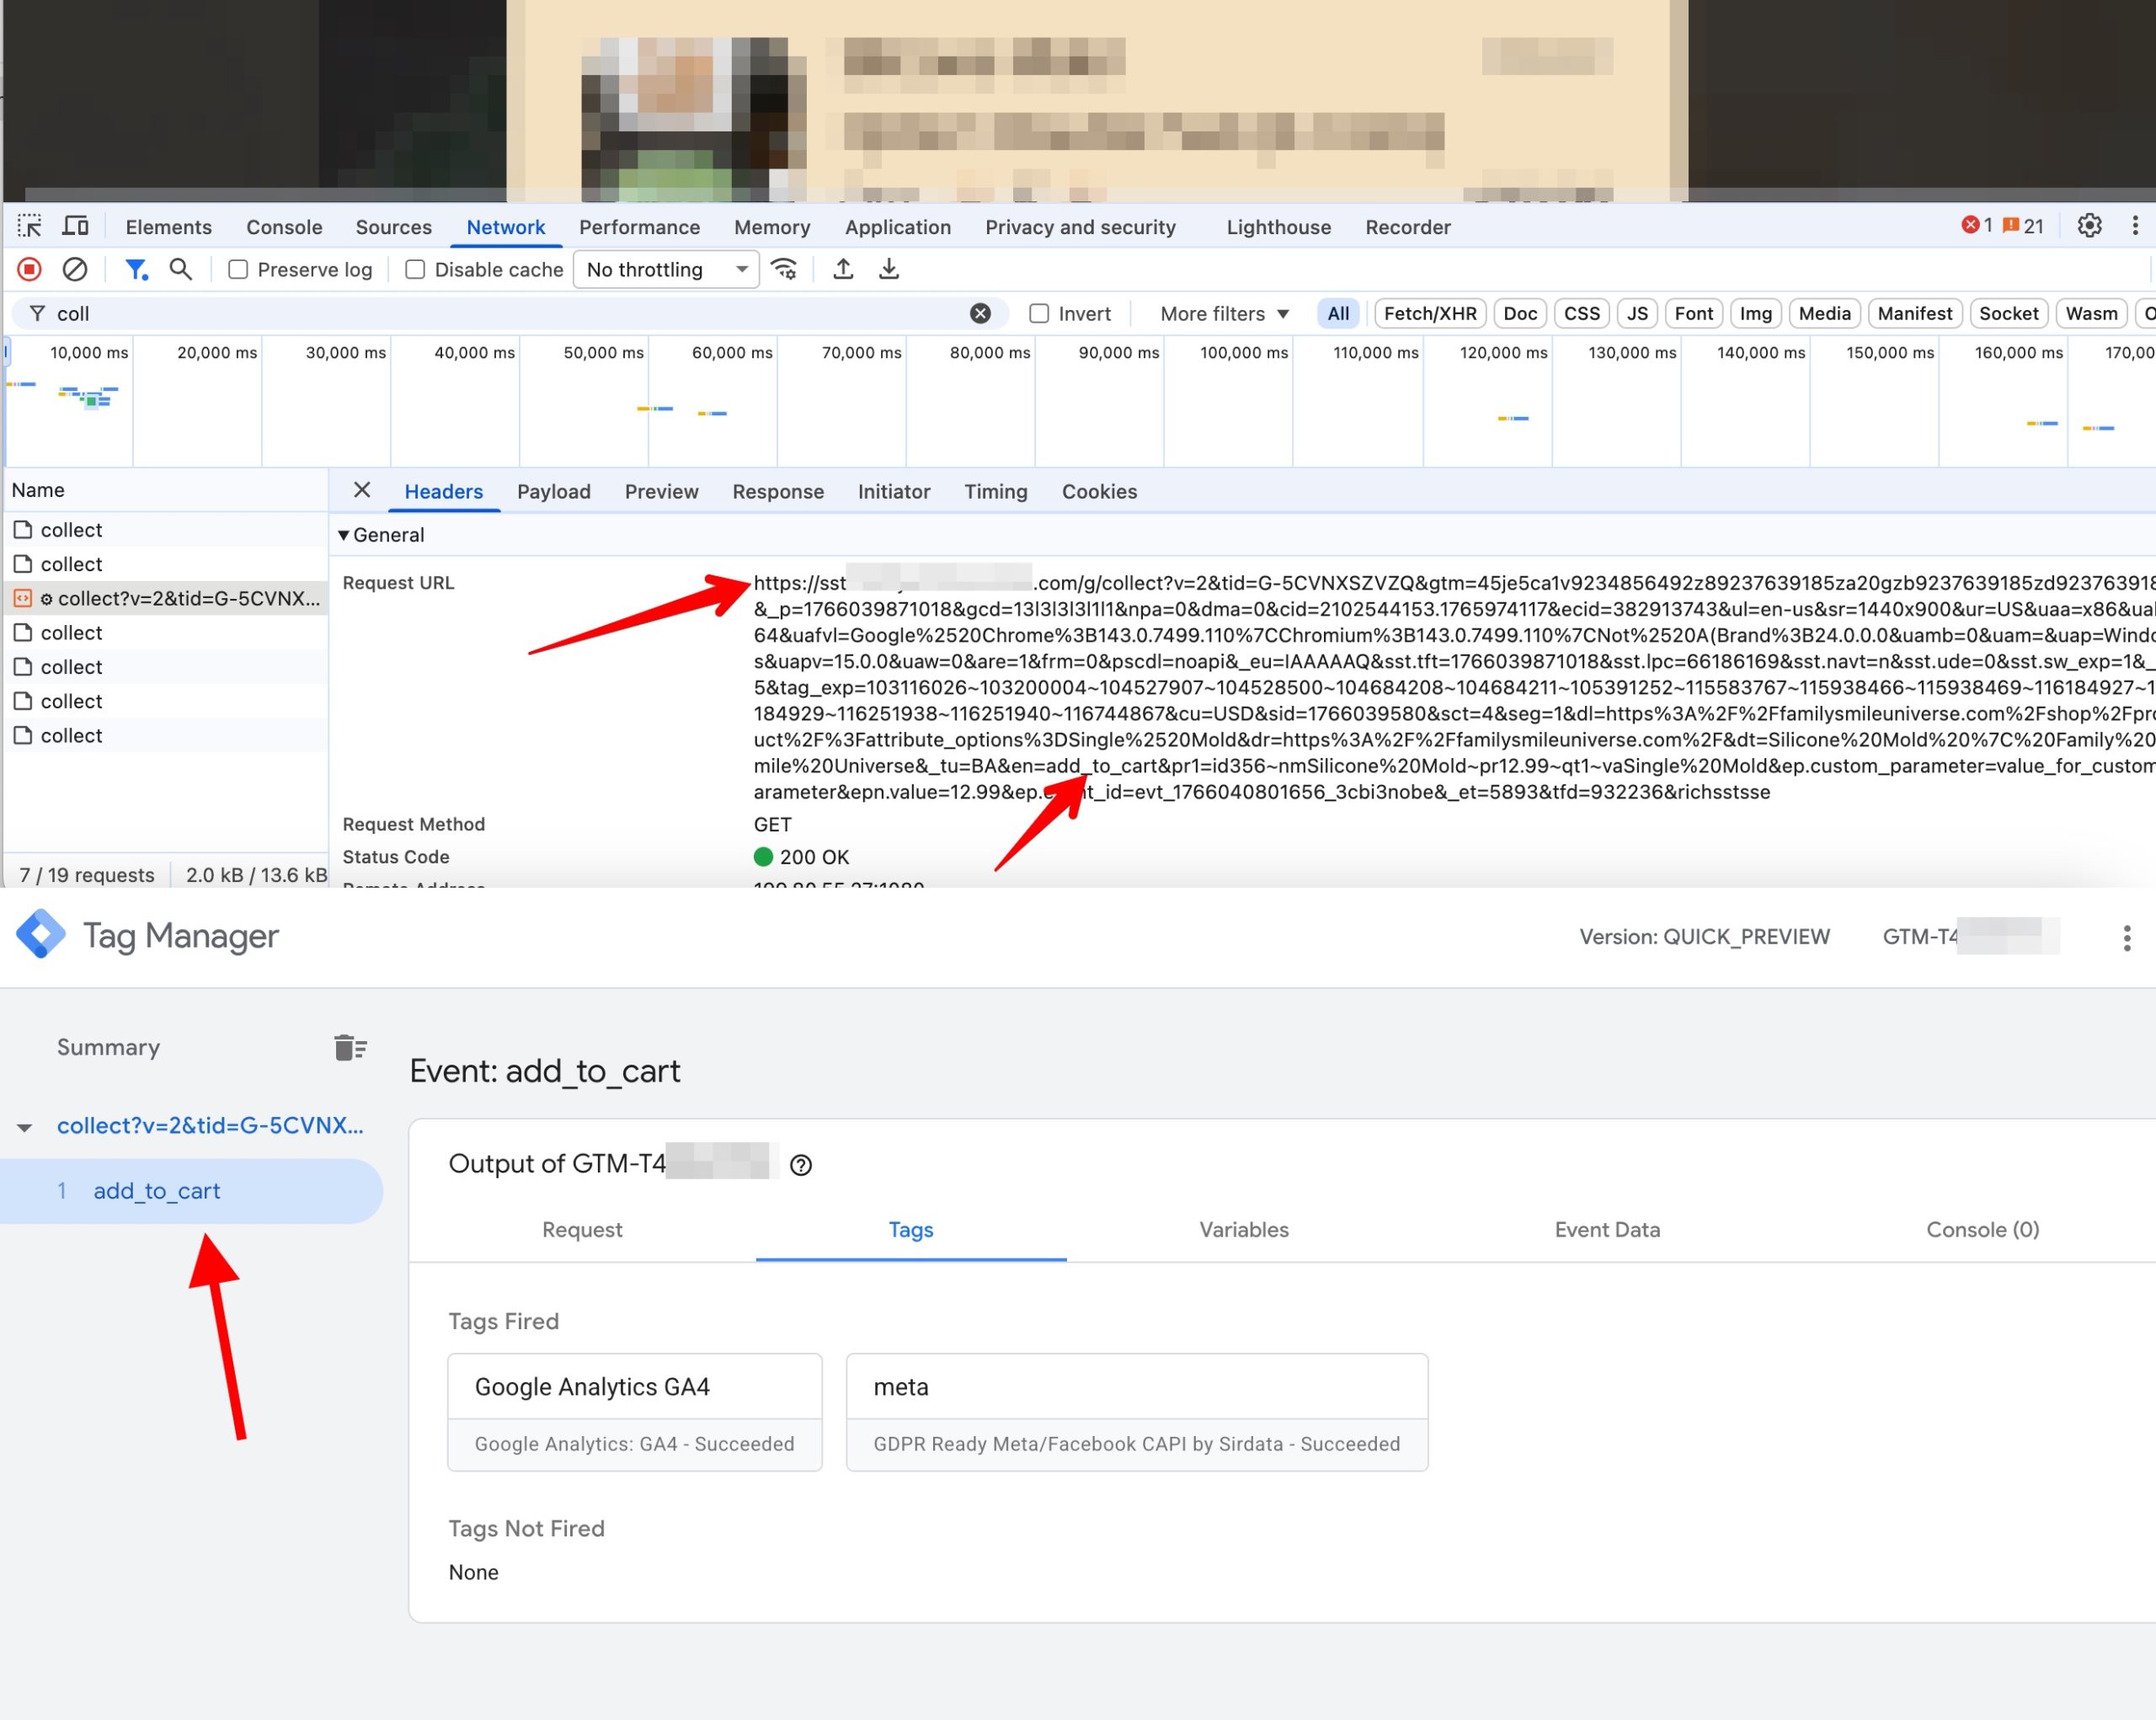
Events from the site need to be sent via DataLayer. All event data is collected into a single object and pushed to DataLayer. How exactly to do this depends on your site’s CMS.
Meta Tag
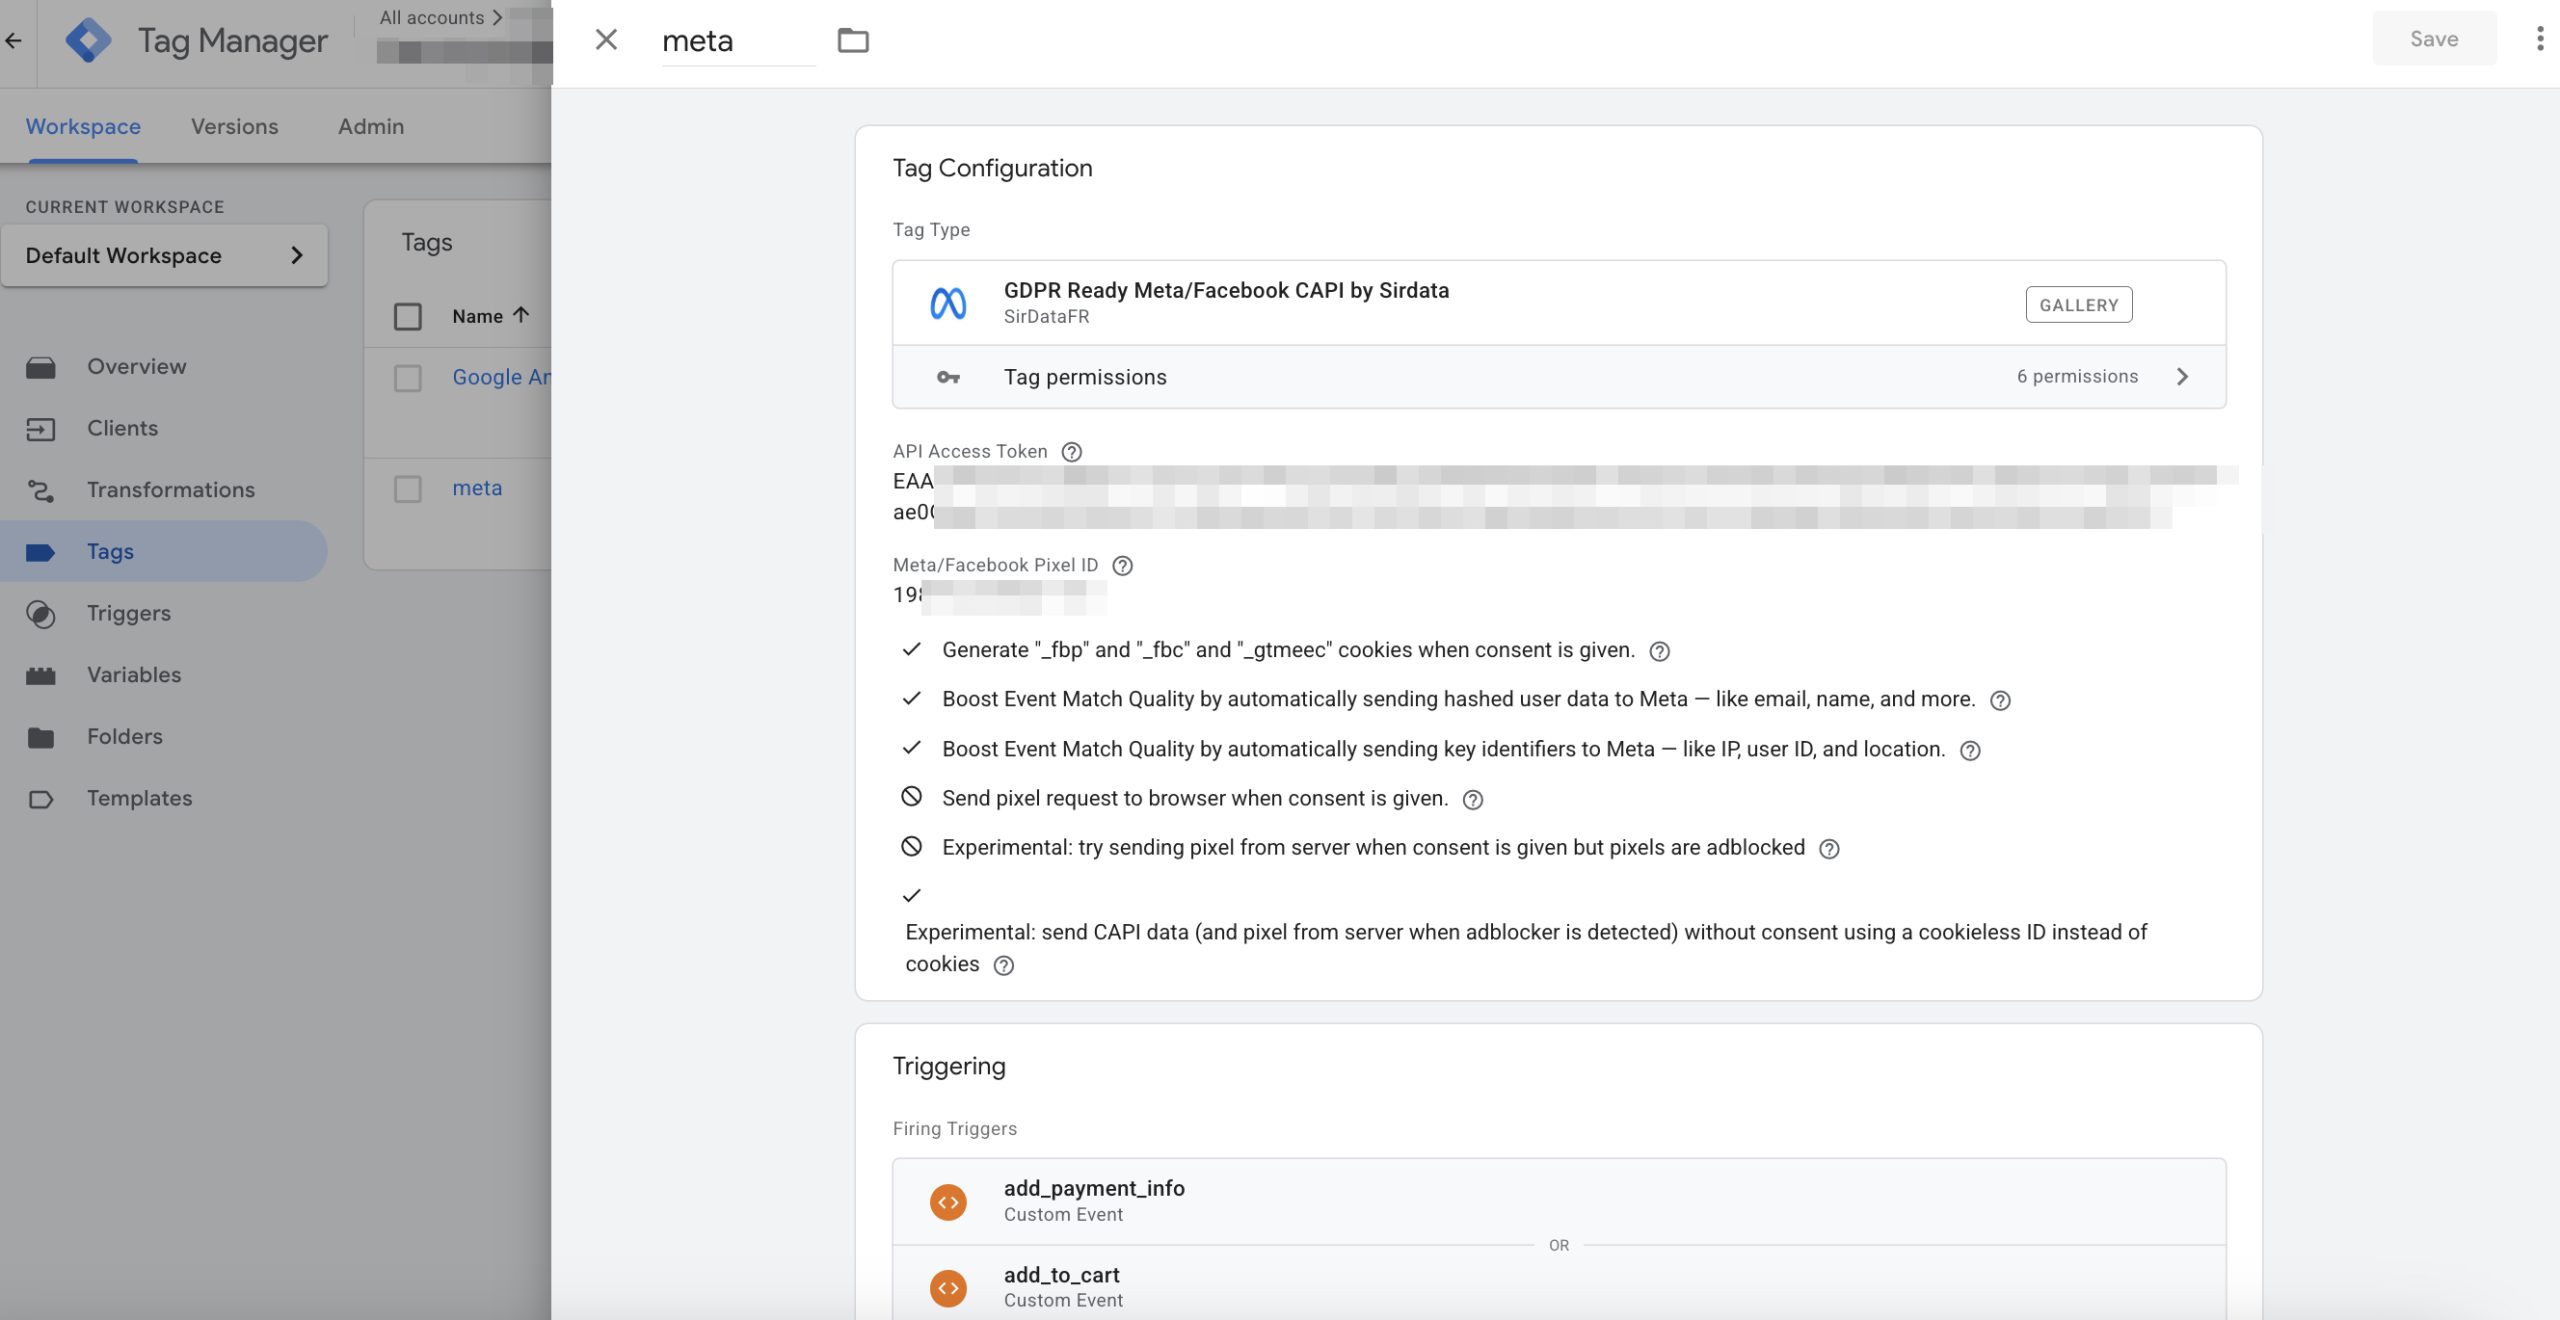
To send events to Meta, you need to create a new tag on the server via “Discover more tag types in the Community Template Gallery” and select, for example, GDPR Ready Meta/Facebook CAPI by Sirdata. Enter API token, Pixel ID and set the tag to fire on all events.
Consent
Requests to Meta server may not be sent if you don’t have a banner with active user consent for cookie data collection. You can disable this option in the setting Experimental: send CAPI data (and pixel from server when adblocker is detected) without consent using a cookieless ID instead of cookies.
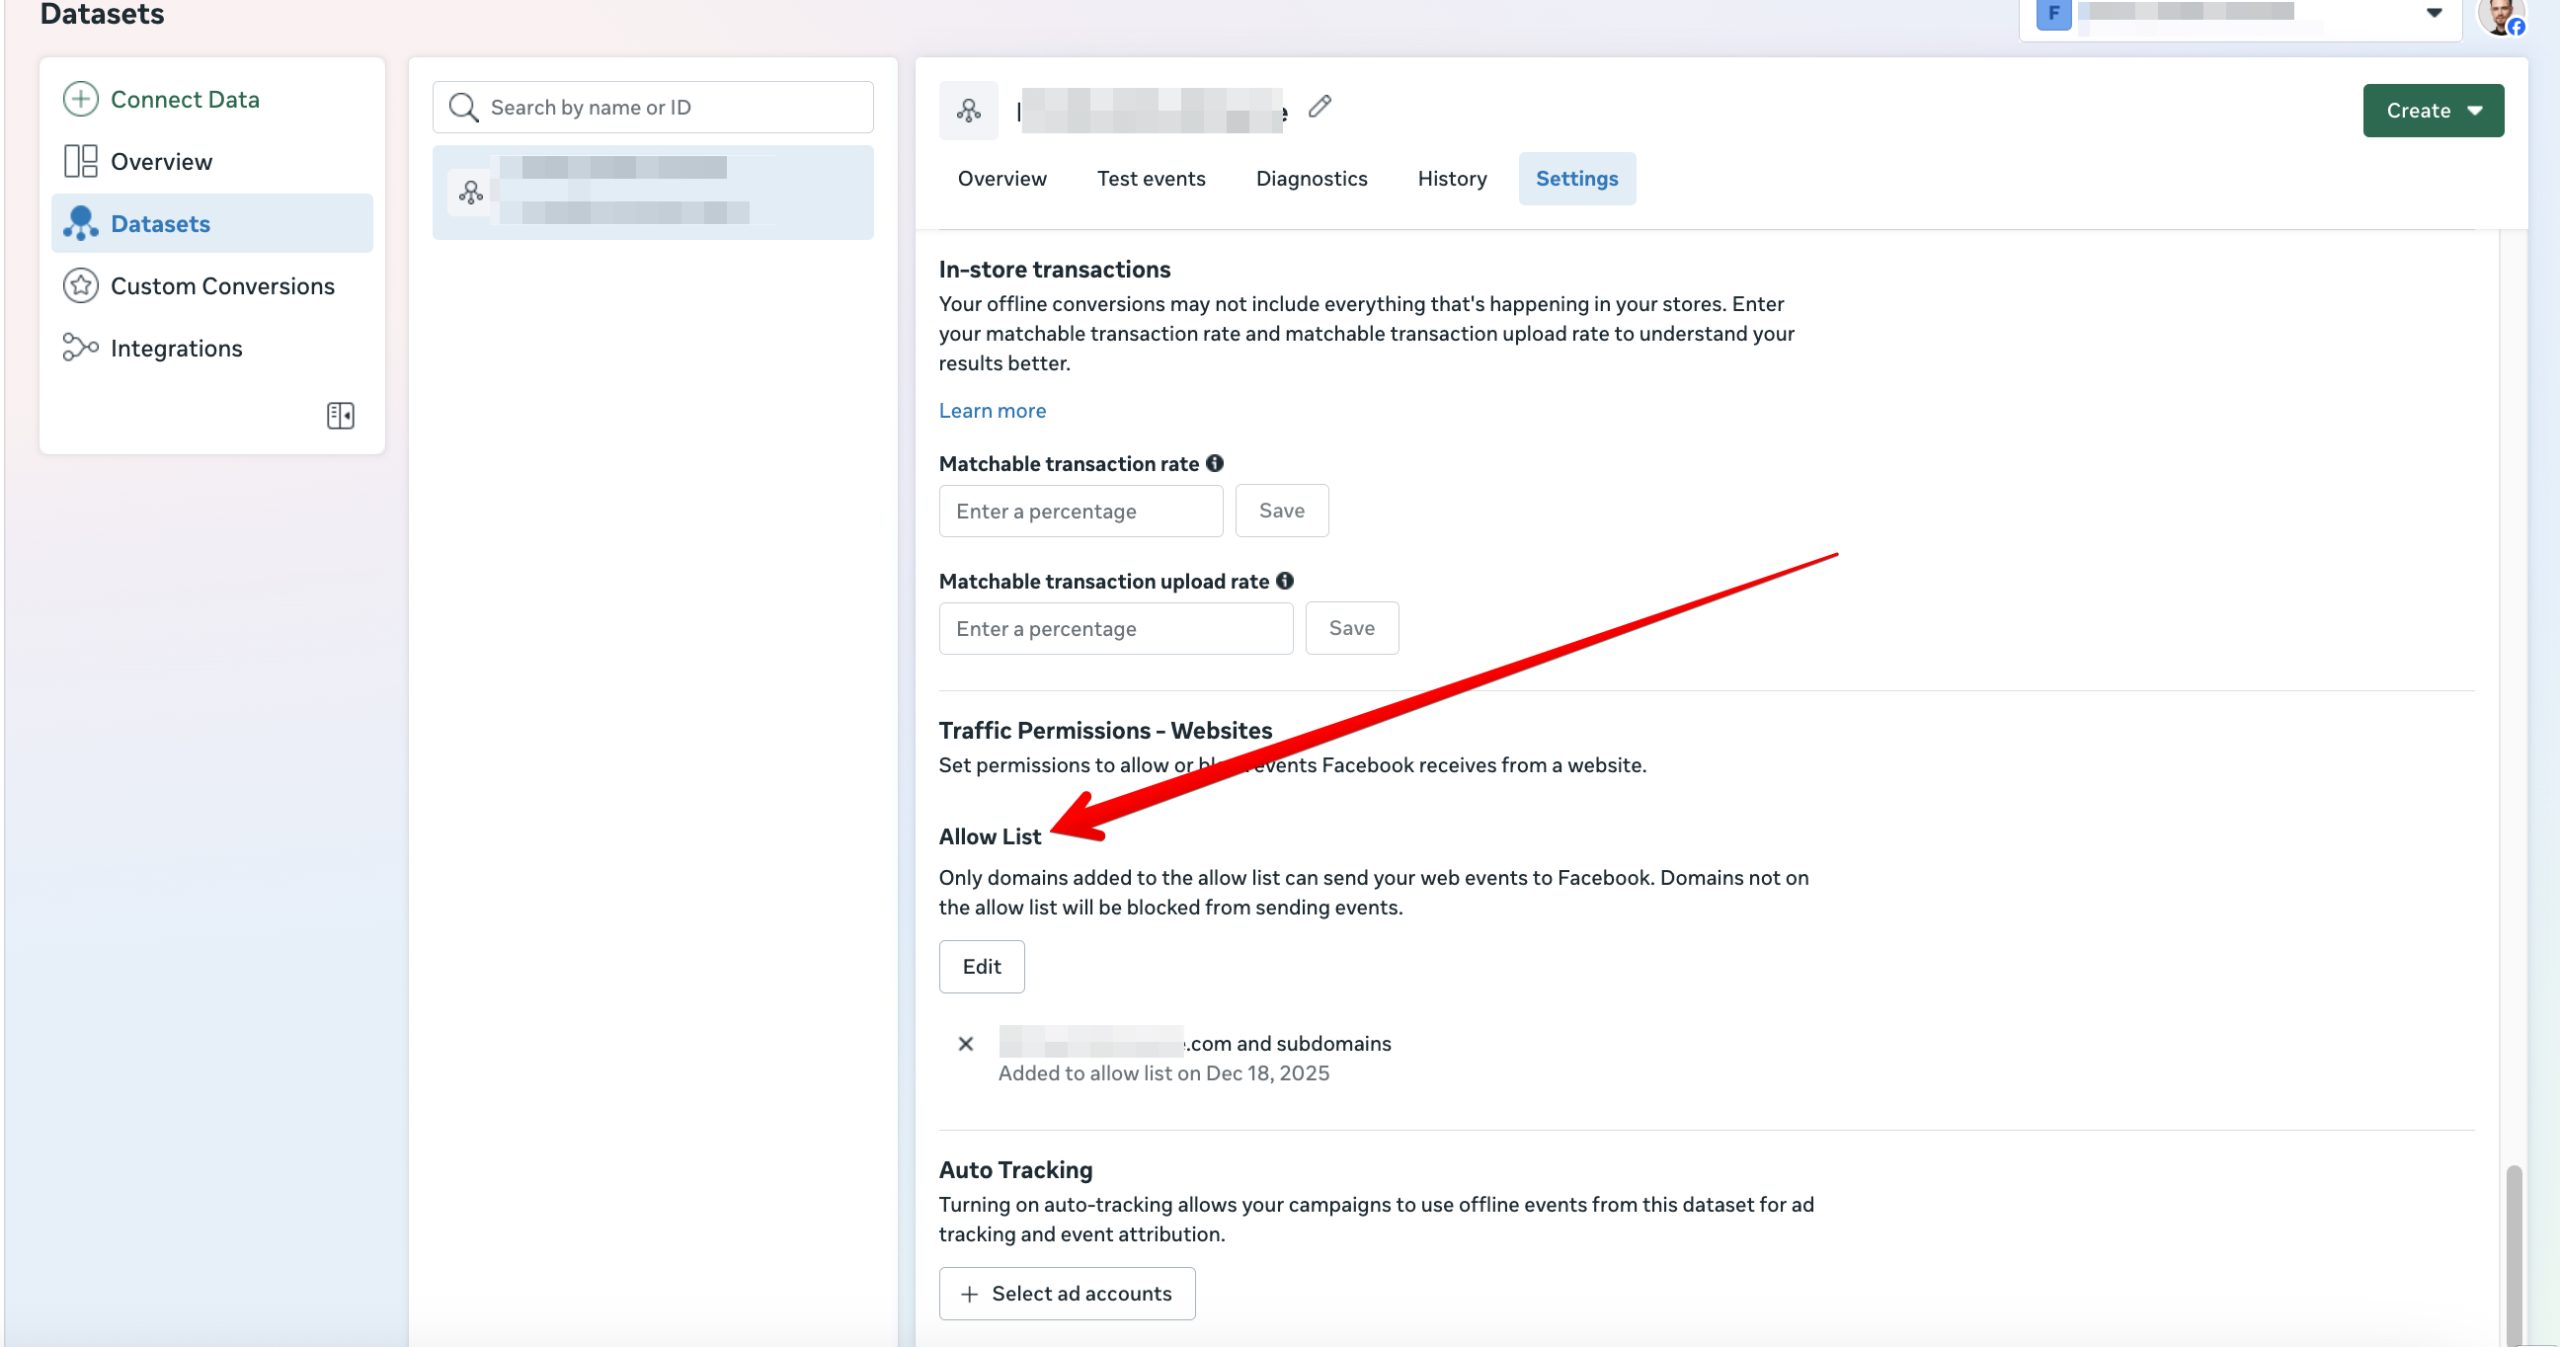
Allowed Domains
In Datasets settings you need to allow receiving data from your domain.
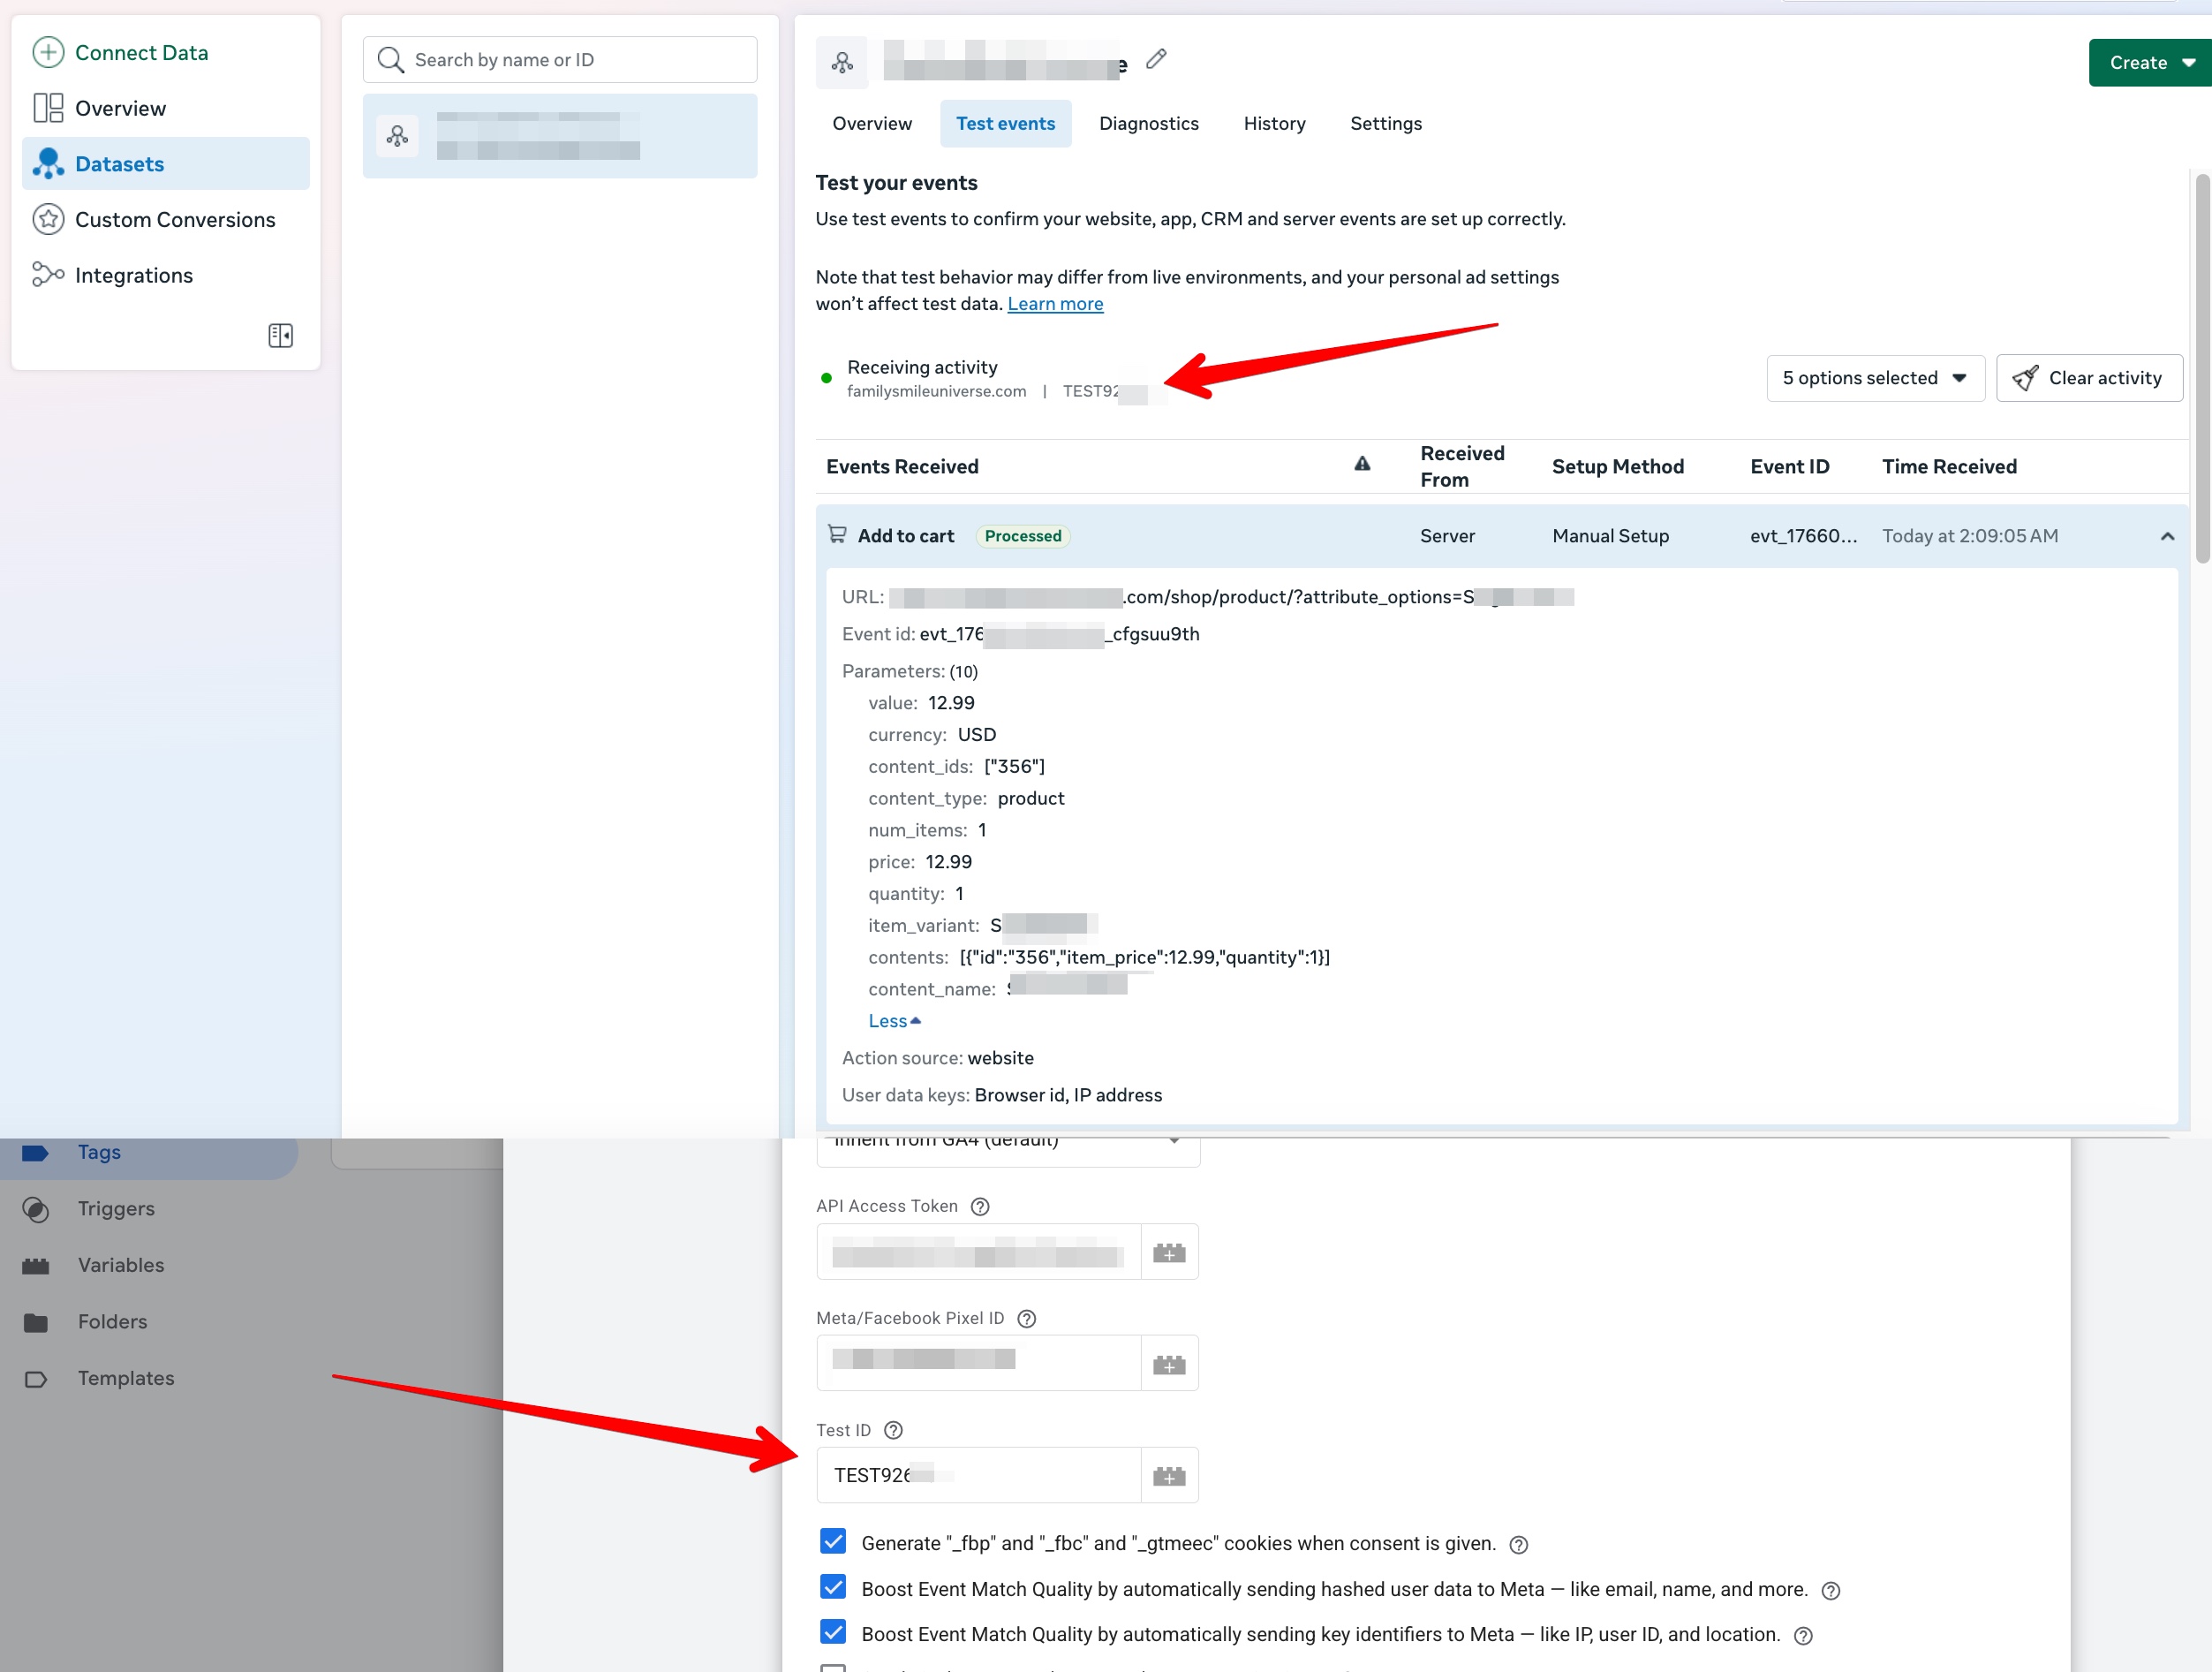
Test ID
You can copy the Test ID to the tag settings, and then you’ll see events in live mode with all parameters. Don’t forget to remove it after setup, otherwise events won’t be counted.
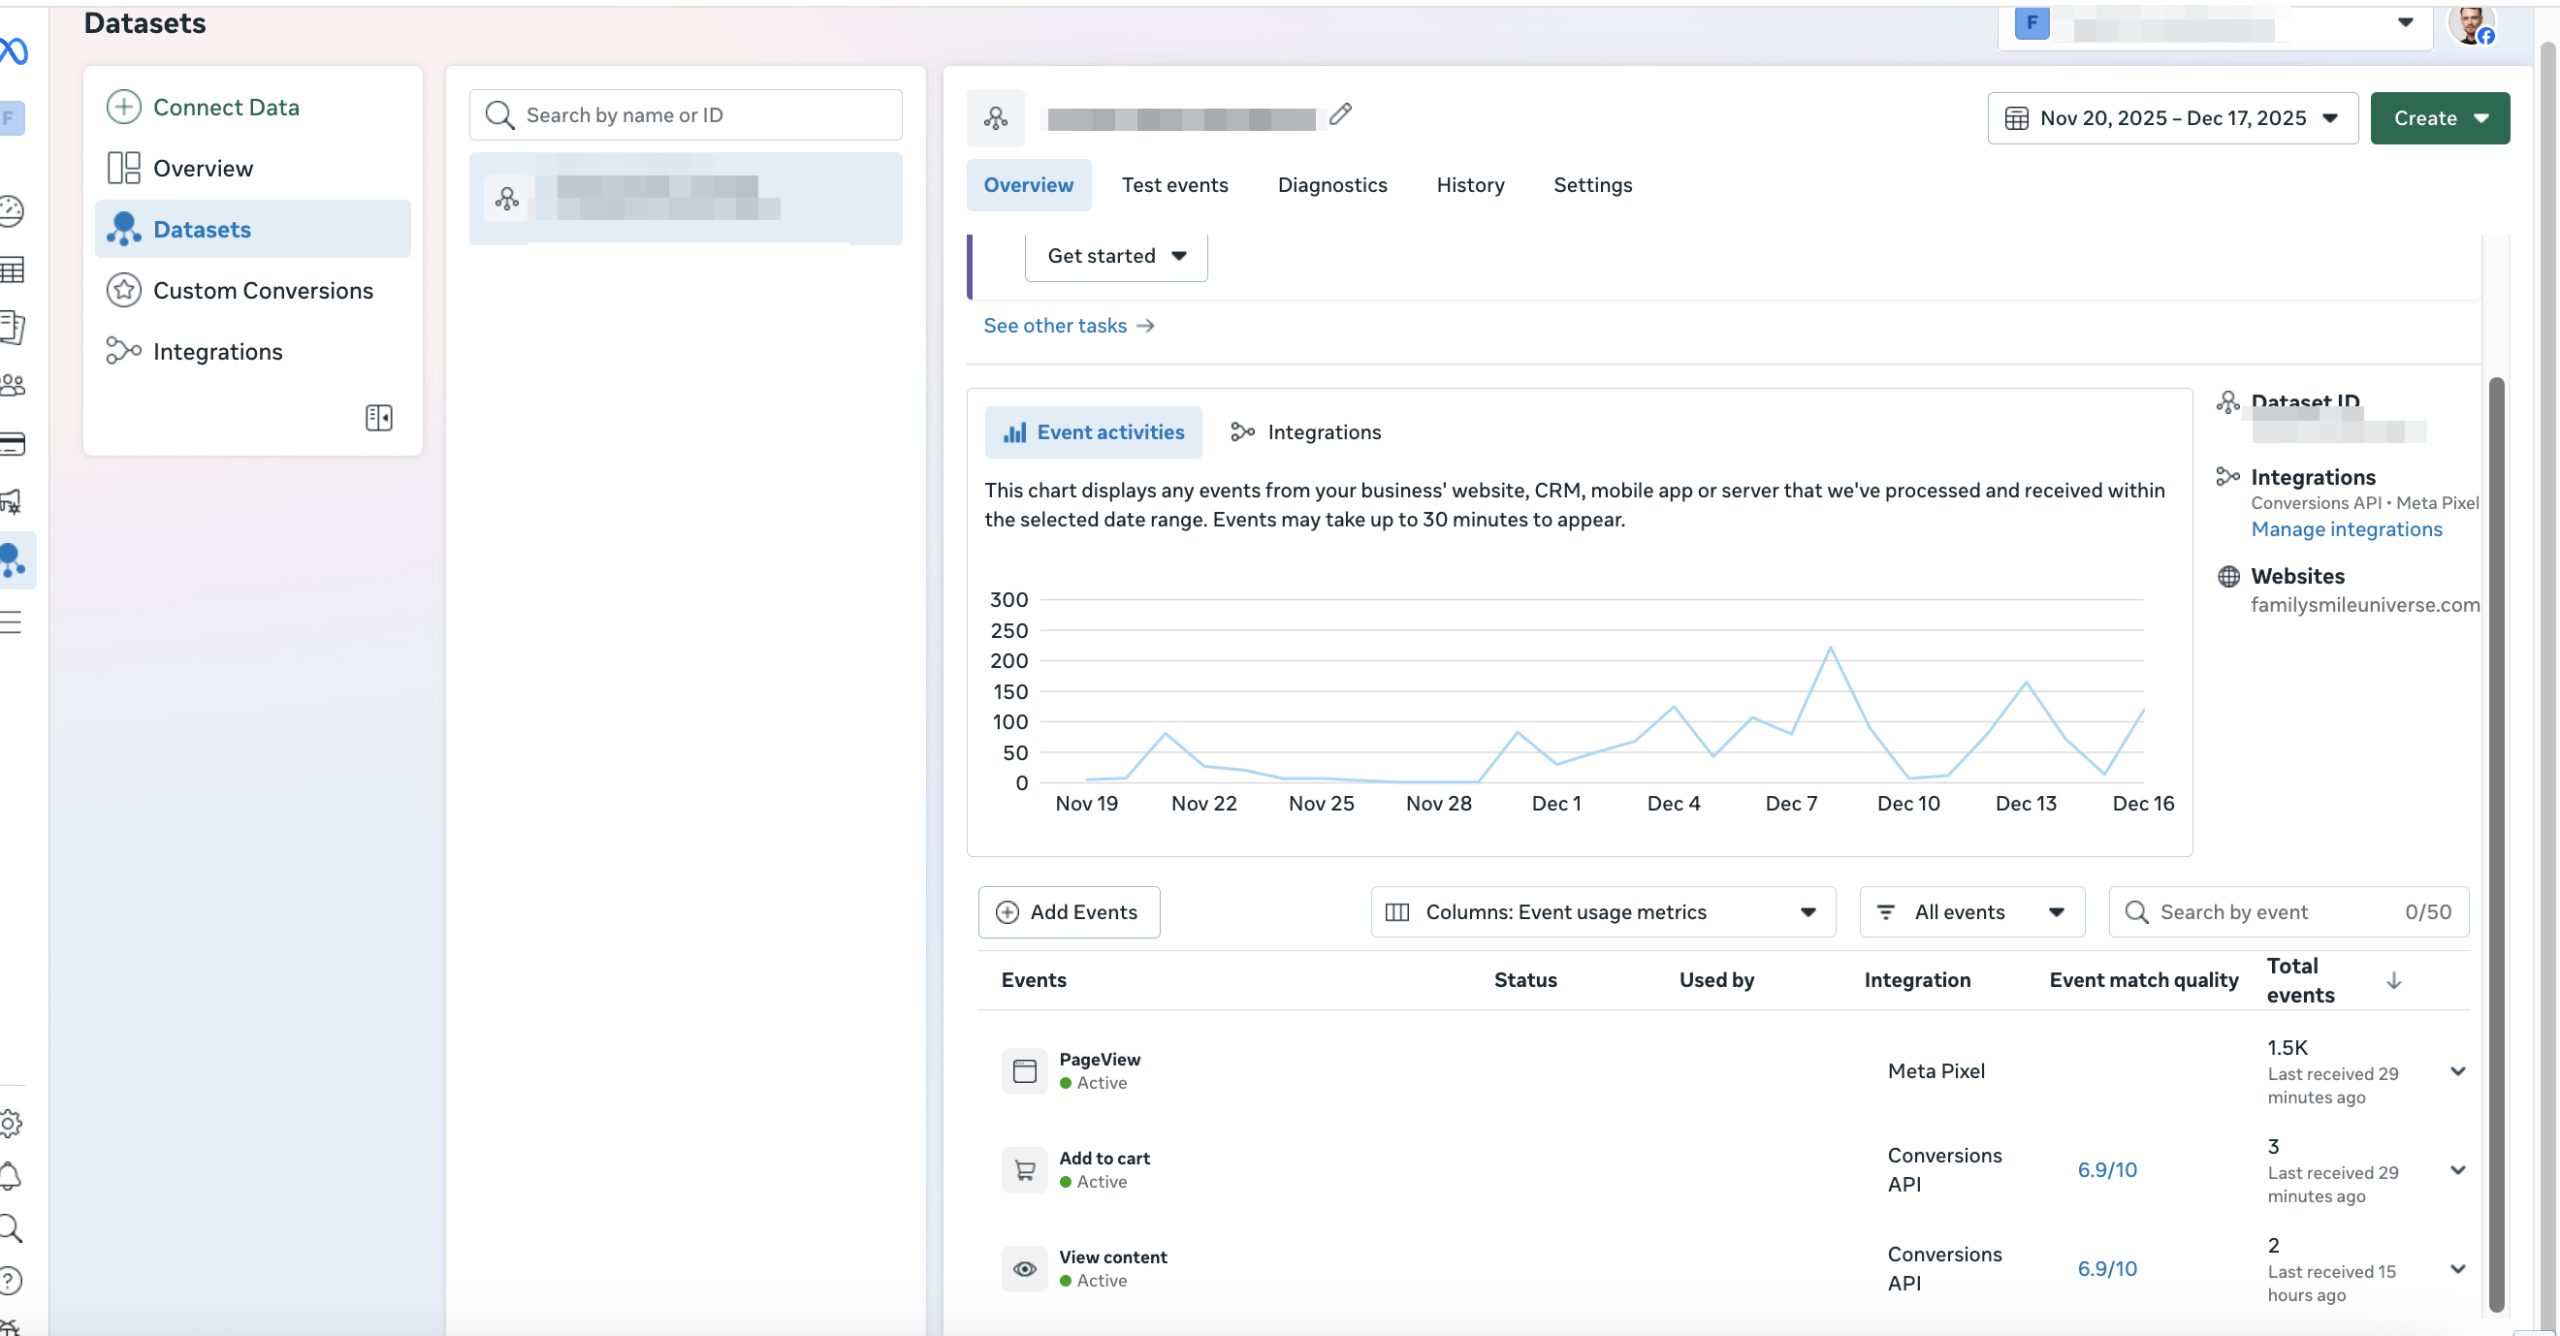
Successful Request
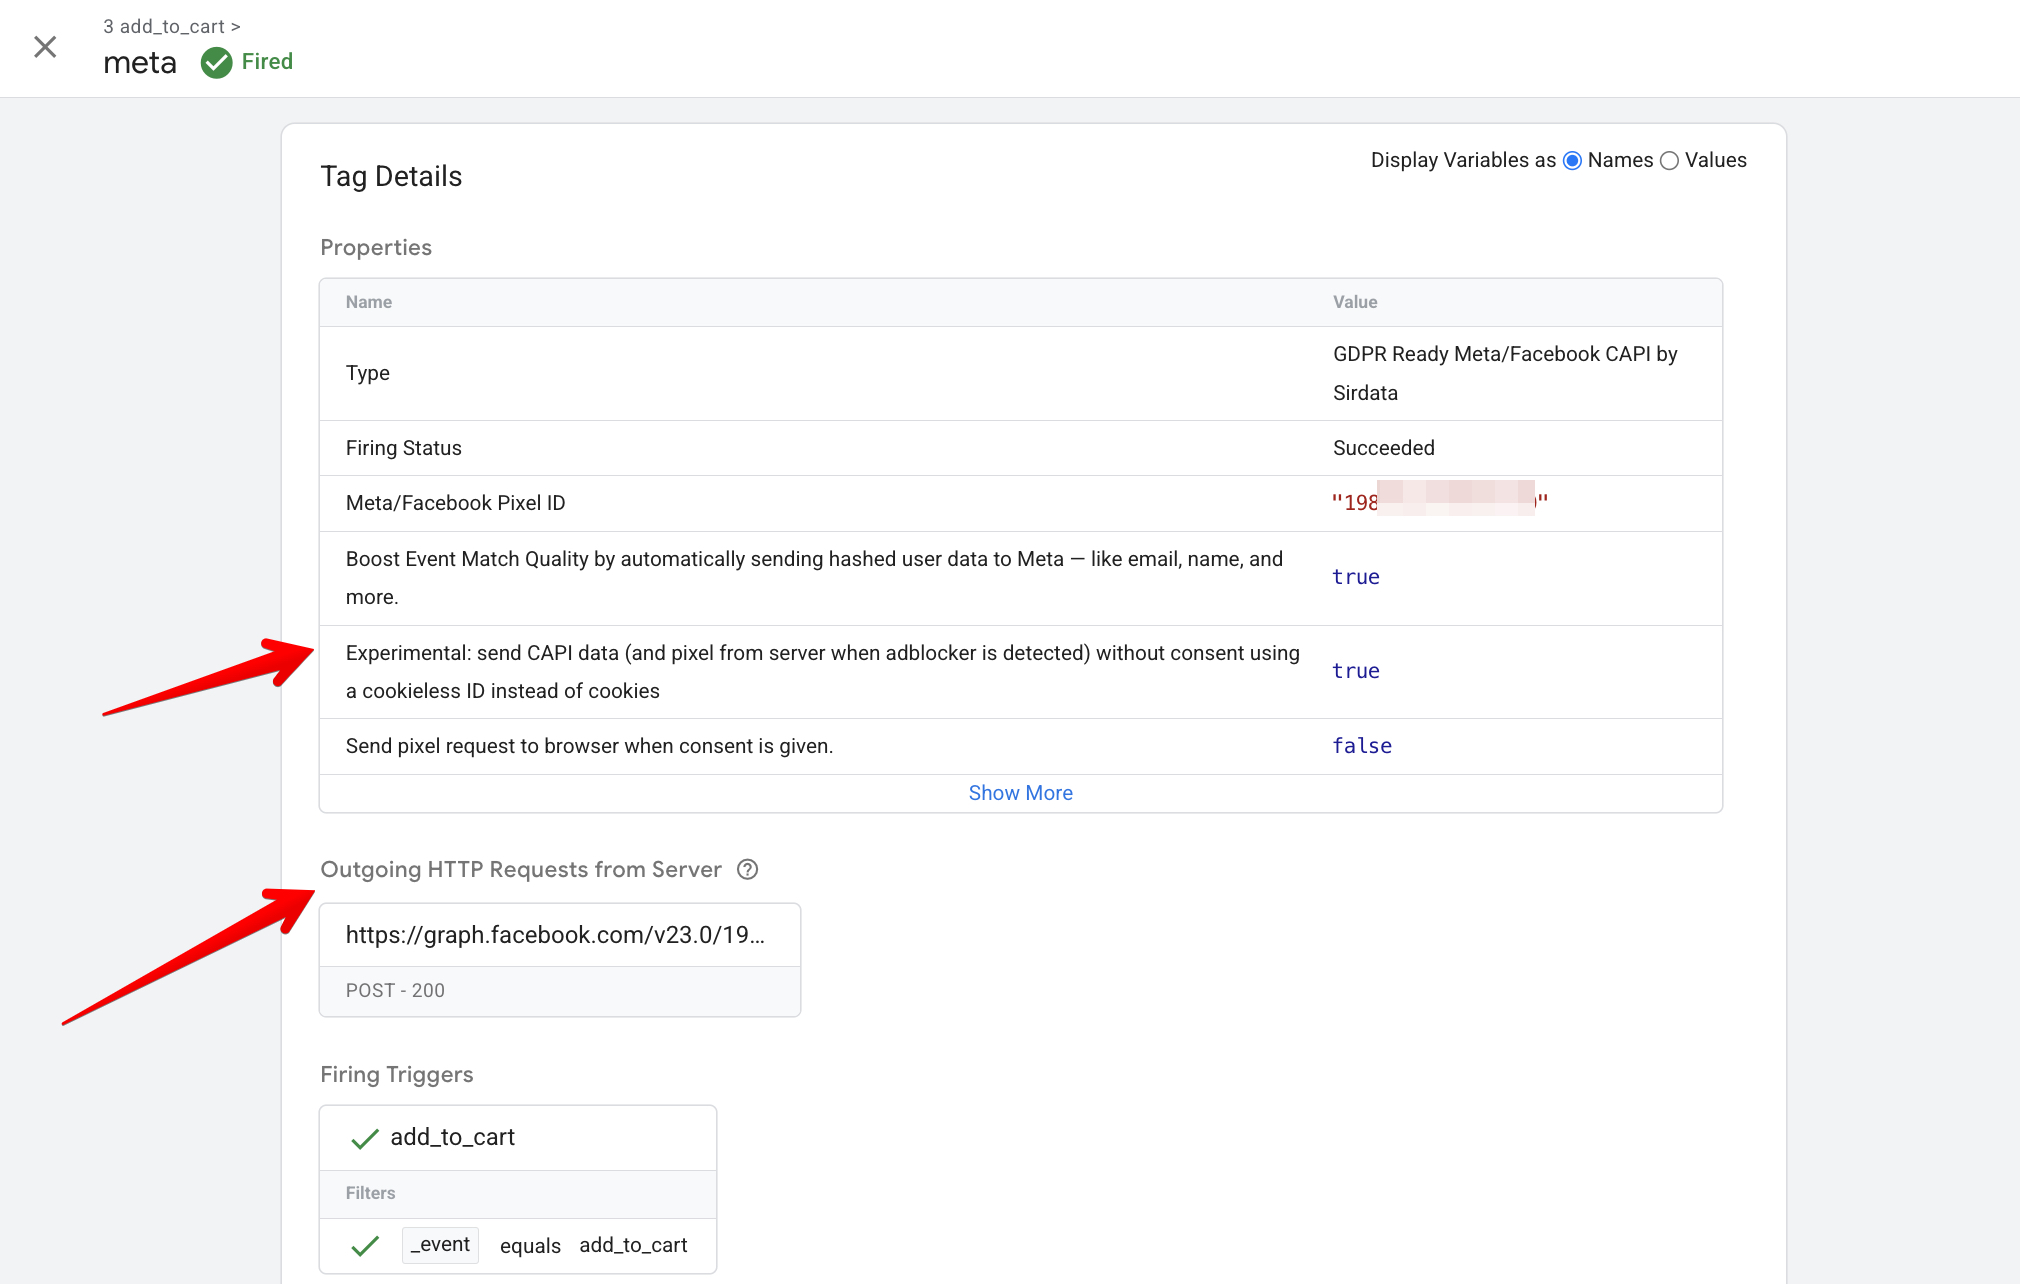
If the request was sent, you’ll see the Meta URL in Outgoing HTTP Requests from Server logs. If you click on it, you can see the parameters being sent to Meta. In Meta’s Overview, parameters may appear with up to 30 minutes delay.
TikTok Tag
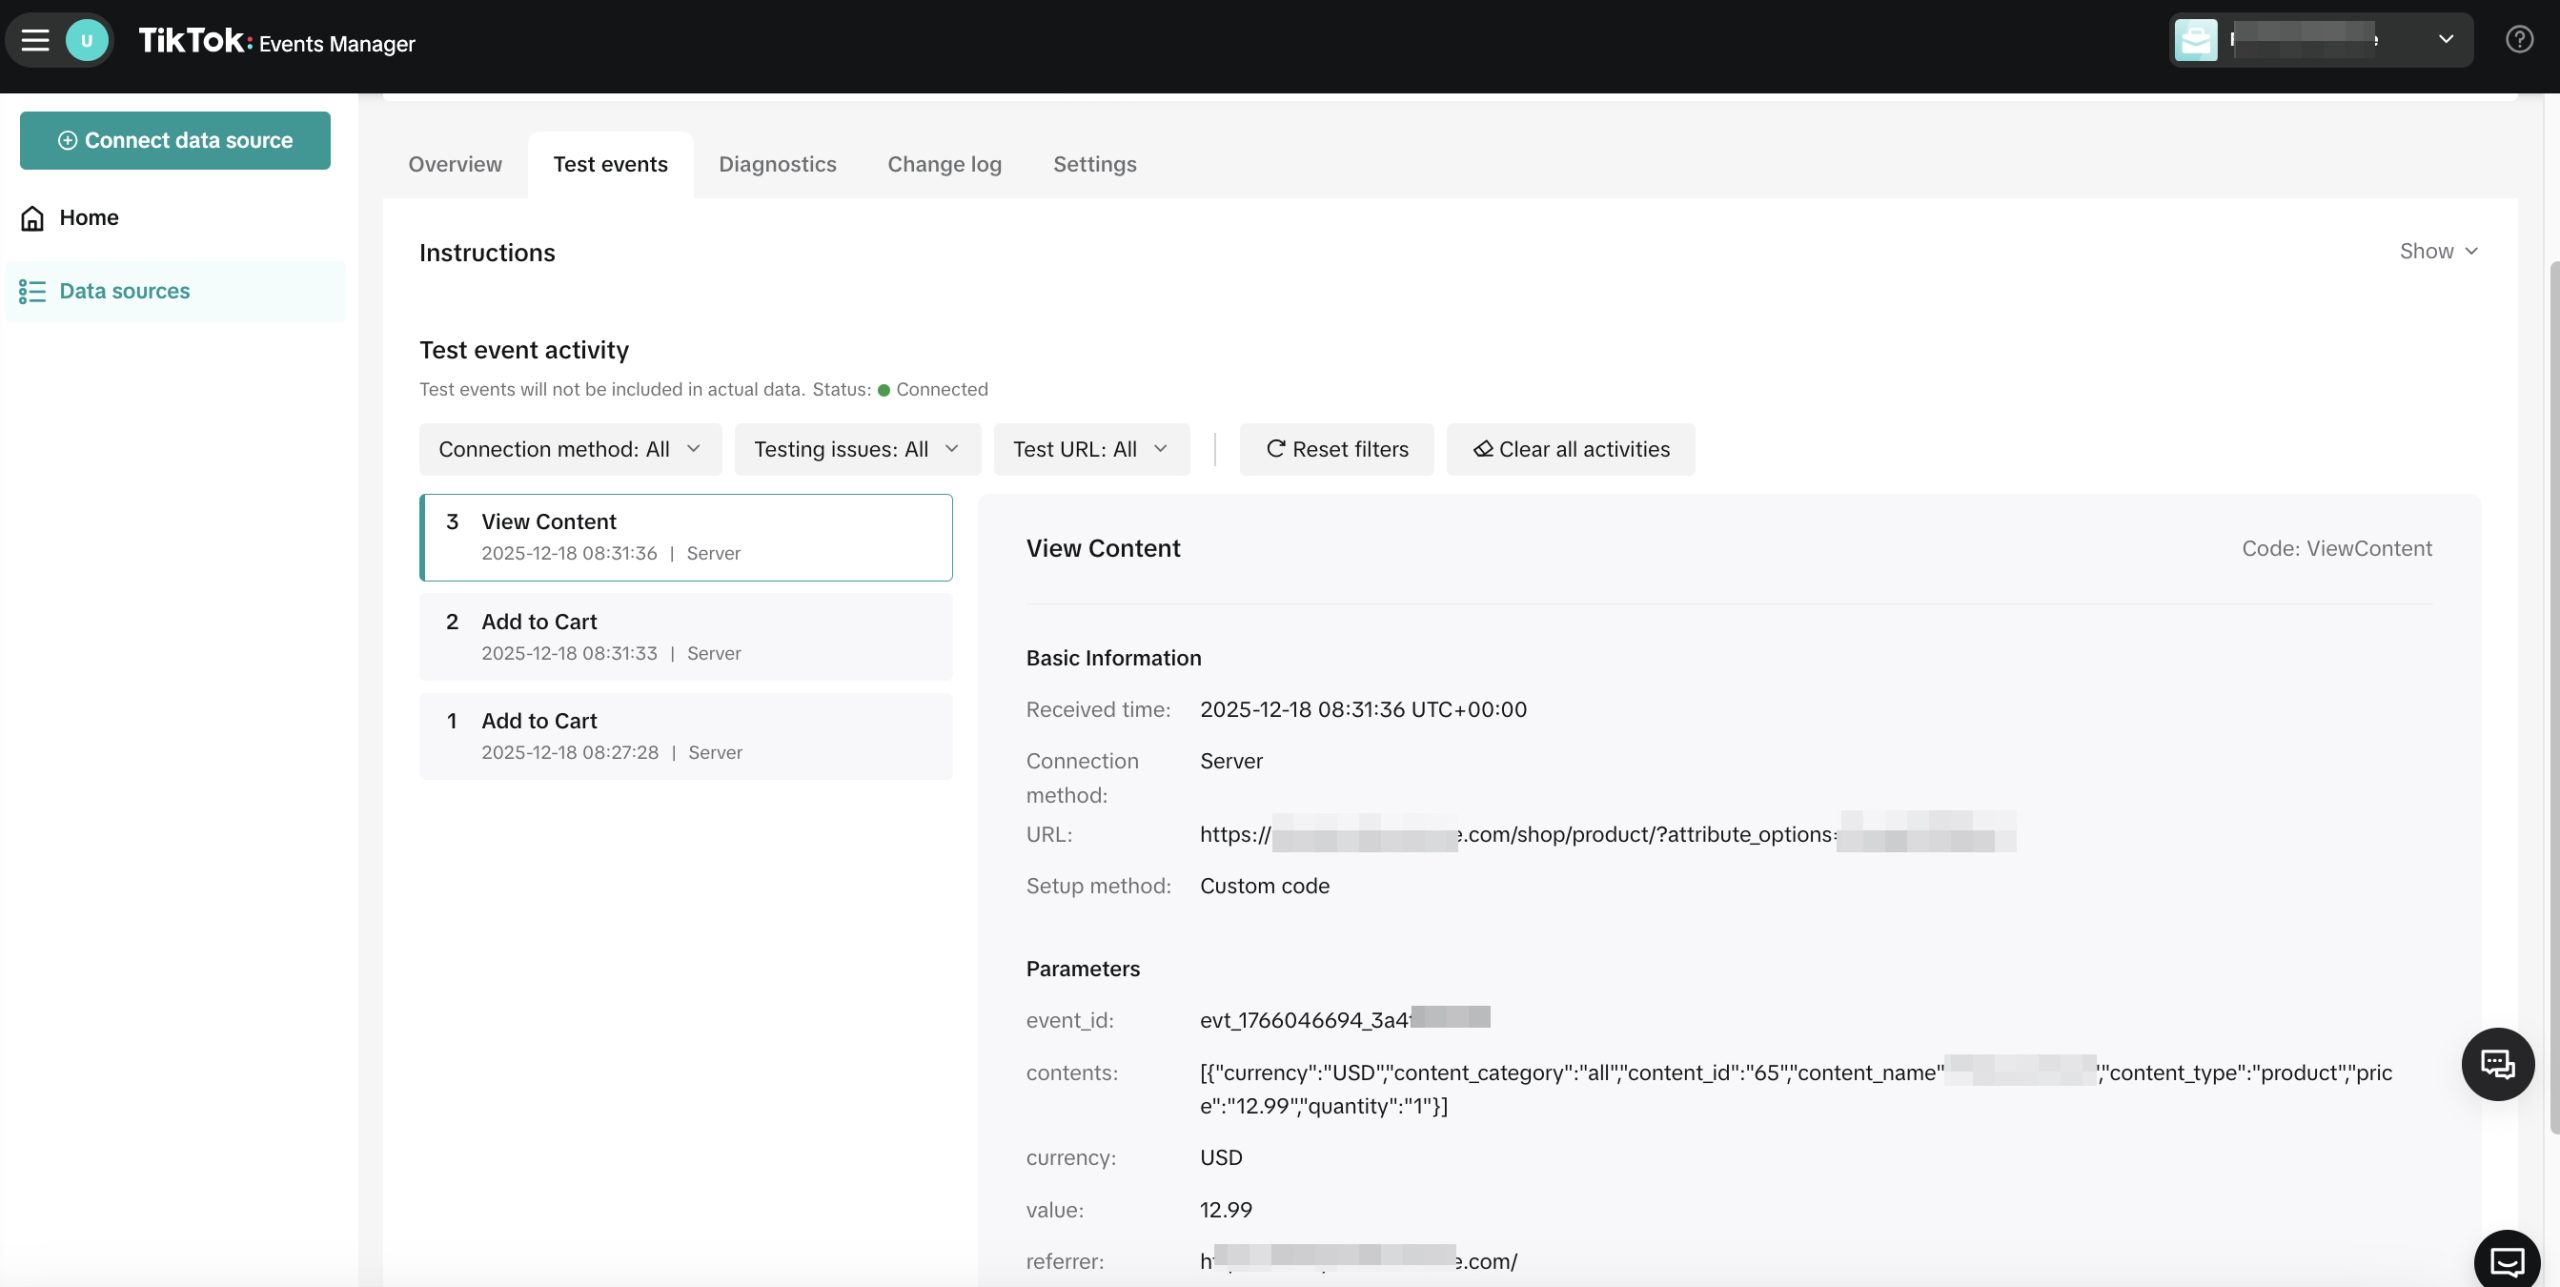
To send events to TikTok, you need to create a new tag on the server via “Discover more tag types in the Community Template Gallery” and select, for example, TikTok Events API (Official). Enter Pixel ID, Access Token. Set Event Name as a variable {{Event Name}}.
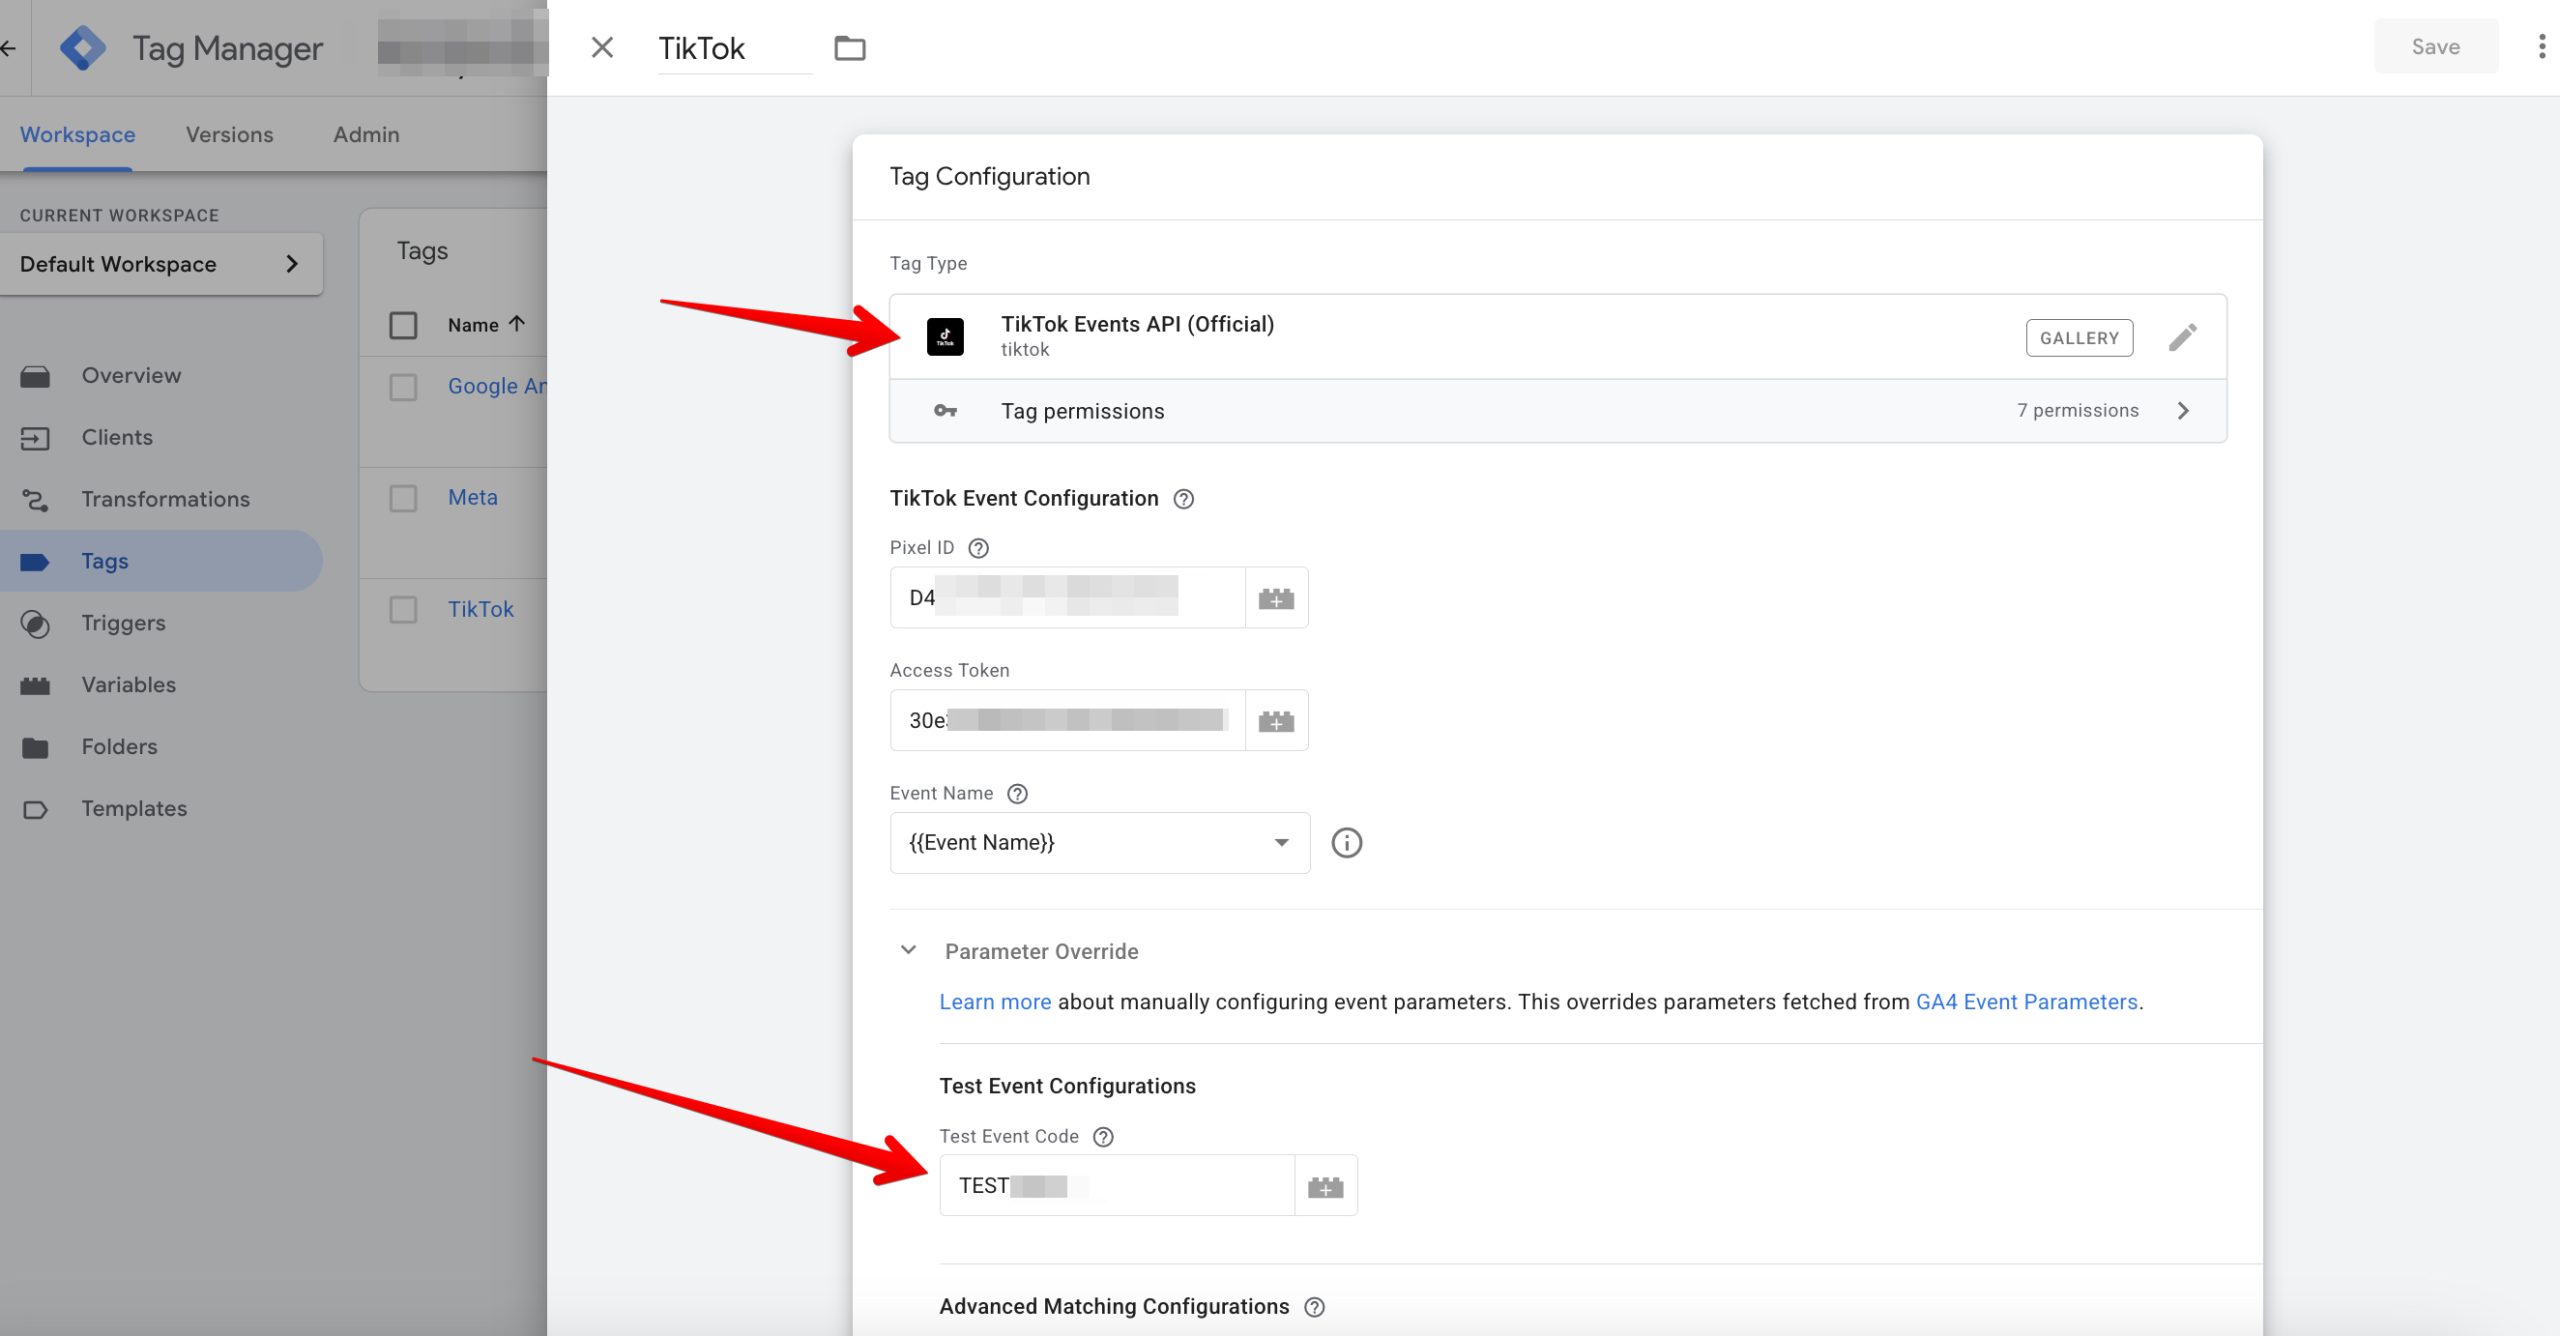
Test ID
You can copy the Test ID to the tag settings, and then you’ll see events in live mode with all parameters. Don’t forget to remove it after setup, otherwise events won’t be counted.